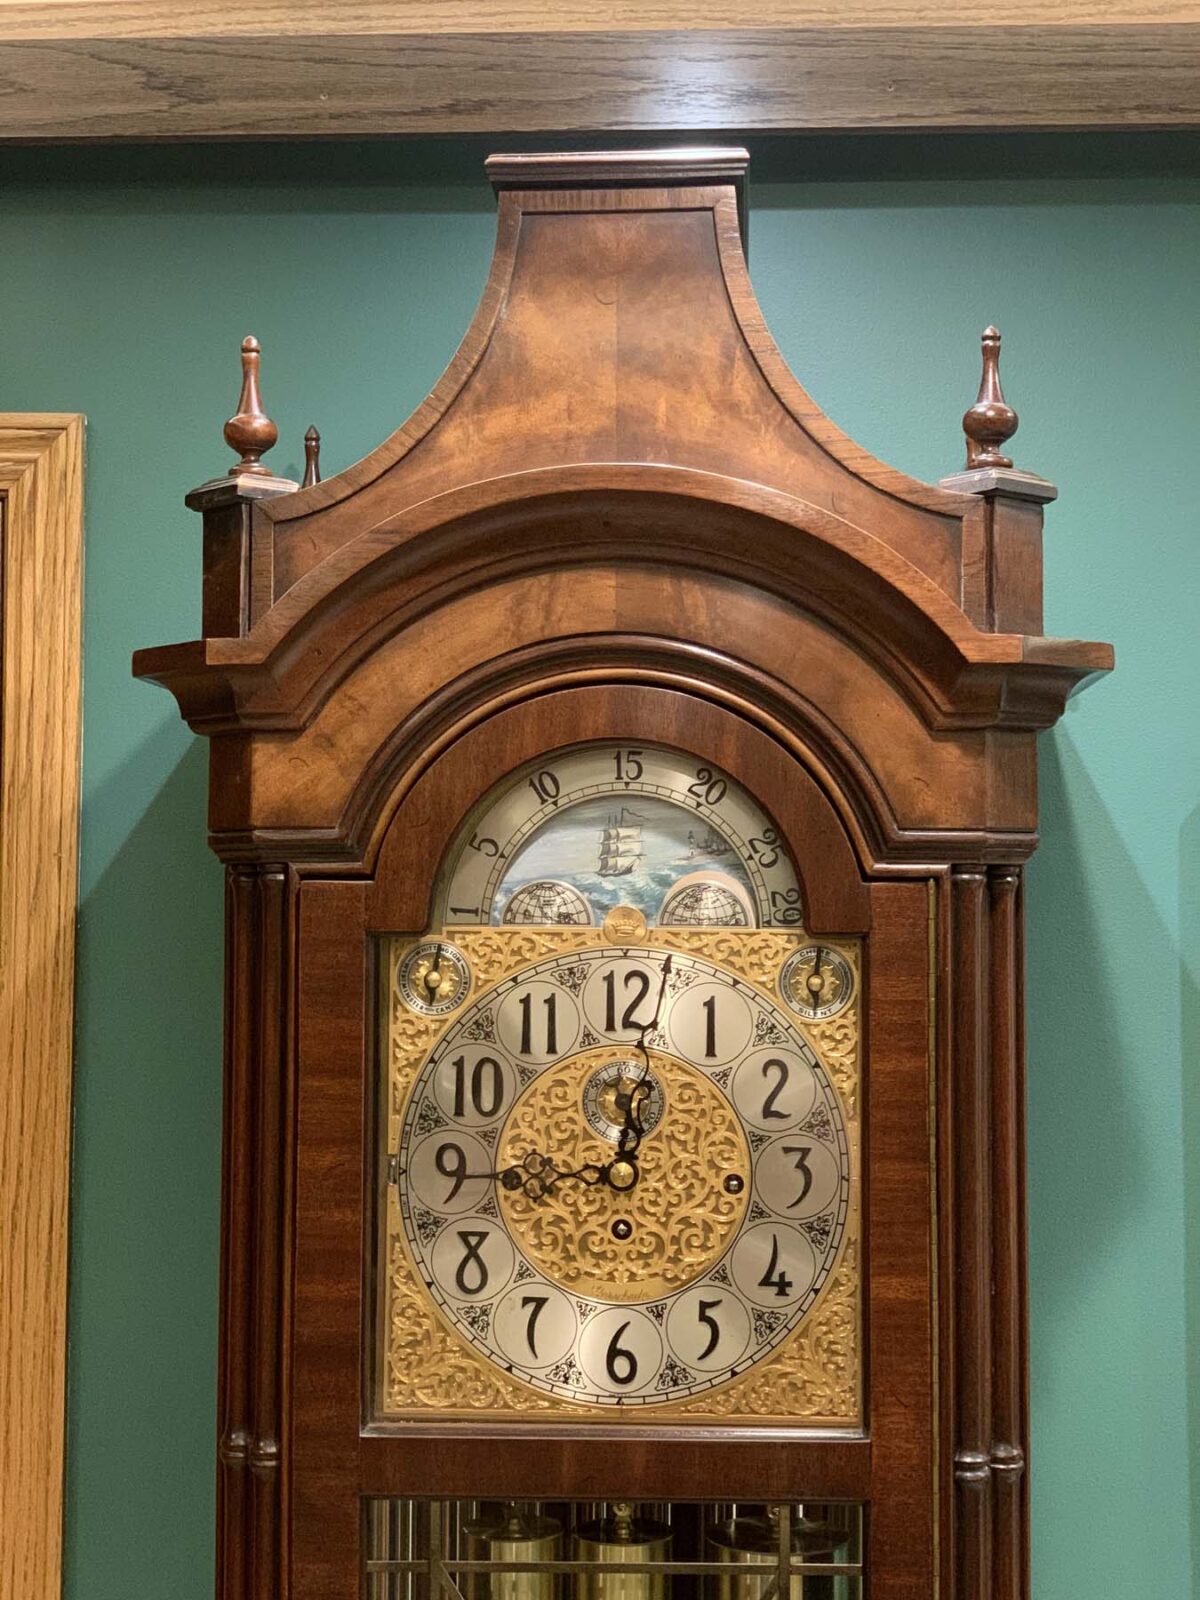
I purchased a fantastic Herschede Wellington 248 clock that needed an overhaul. This clock dates to around 1975 and is quite a bit newer than my usual periods of interest, but I fell in love with the case design, and as Herschede was pretty much the Ferrari of clocks, made an exception for an exceptional piece.
Herschede was in business from 1885 to 1983 beginning in Ohio and moving to Mississippi in the 1950’s. In the very early years they used imported movements, but for the majority of their life, Herschede manufactured the movement as well as the clock cases.
Compared to some companies, Herschede made a relatively small number of different movements and differentiated largely with case design. Everything they did was top quality and many things were hand finished. Their clock prices reflected that.

I received the clock in an unrestored condition and the movement was disgusting. The last service sticker in the clock dates to 1996, and I would believe that it has been almost 25 years since it was last looked at. Black grease was caked on the escape wheel and verge and half of the train wheels. Also, the beautifully damascened movement plates were rusty.
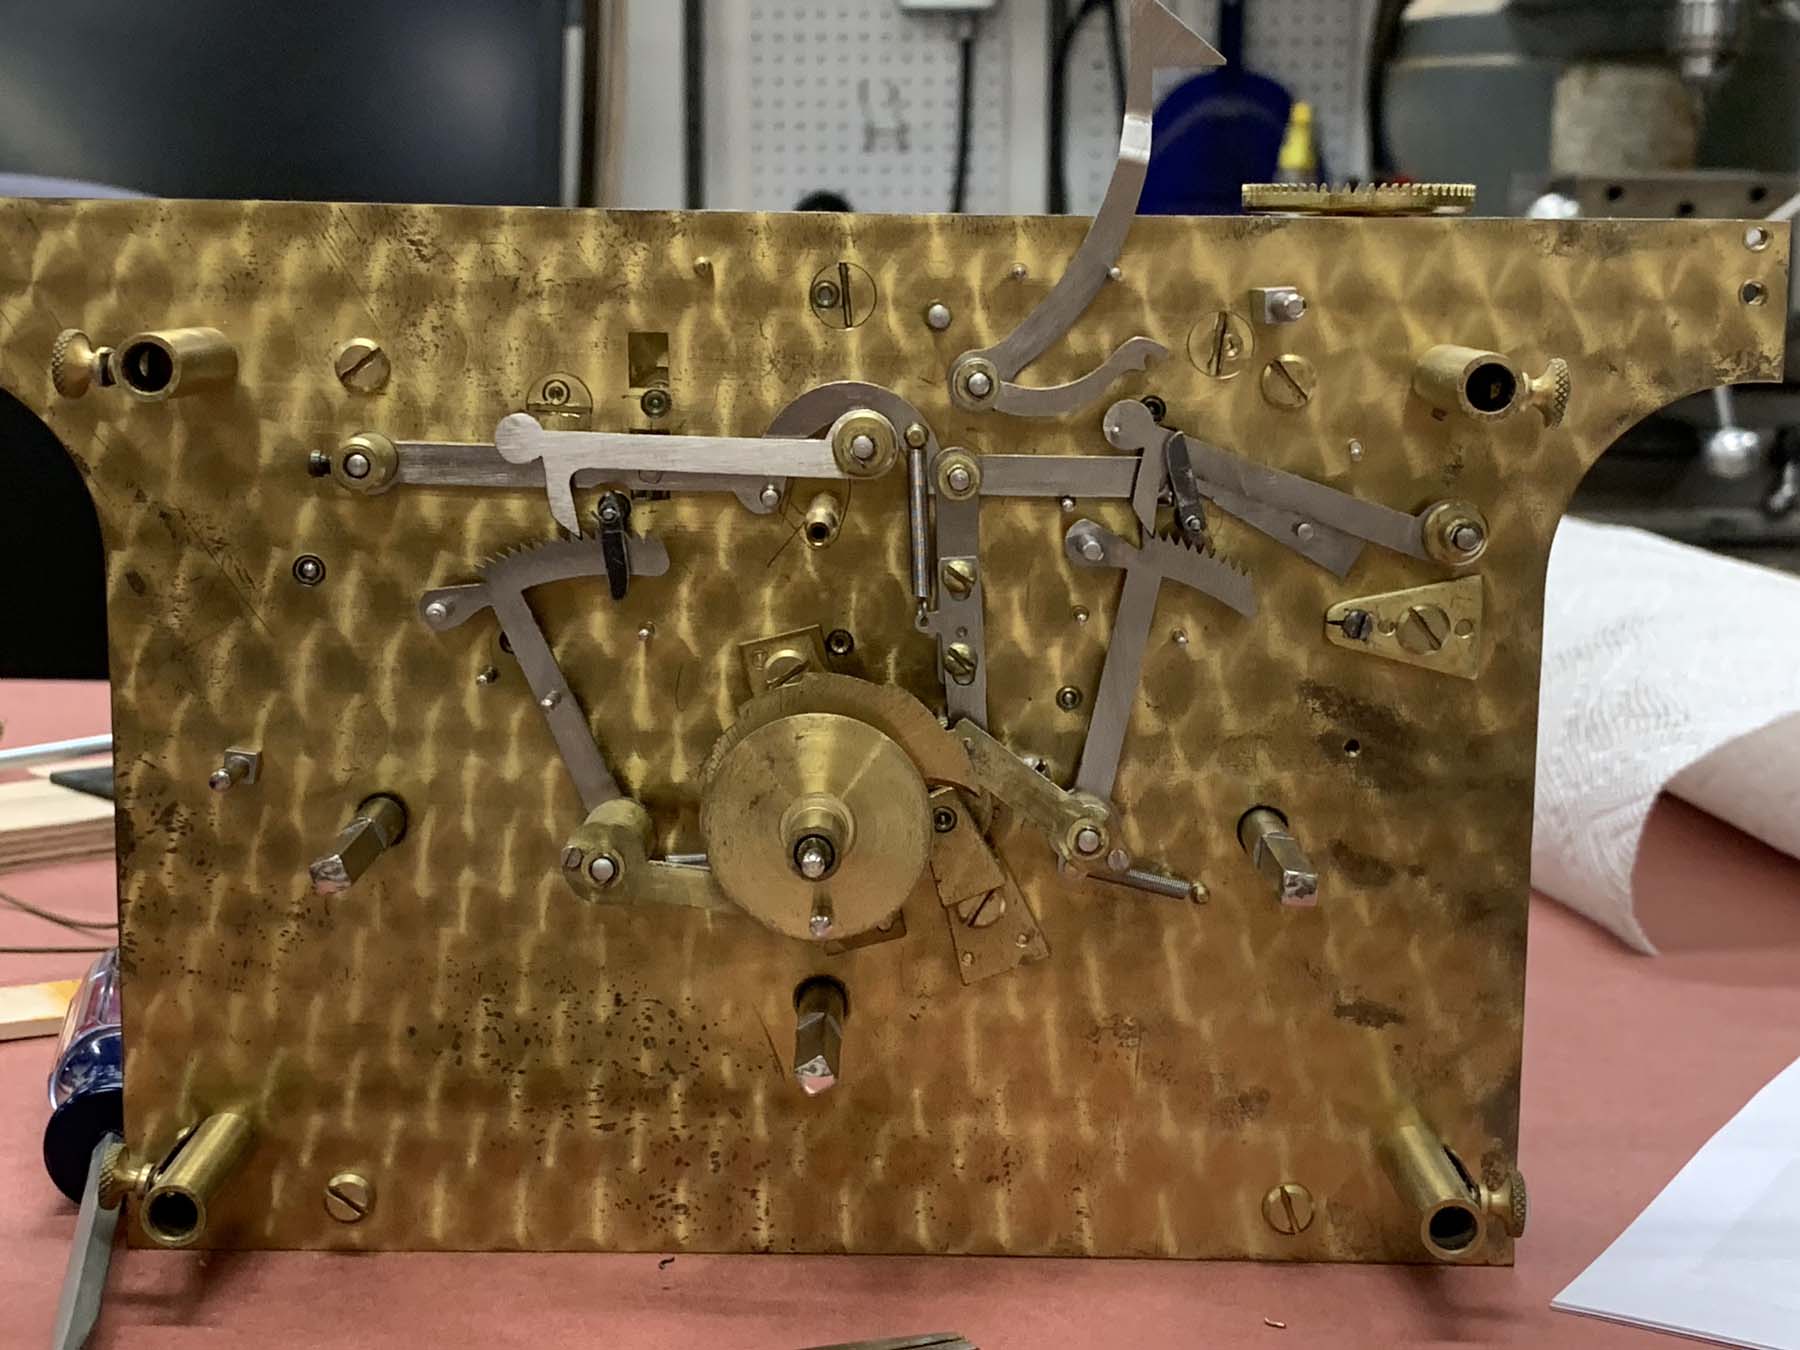
A functional overhaul of the movement was pretty straightforward – happily the verge and escape wheel were in good condition, so the rest of the work was a few bushings plus a thorough degreasing and polishing. I debated on attempting to clean up the clock plates. Inside the clock they are only moderately visible and the damage might be a bit hard to see, but as this is such a special movement, I decided to refinish the clock plates with some direction from Steven Conover’s book on Herschede clocks.
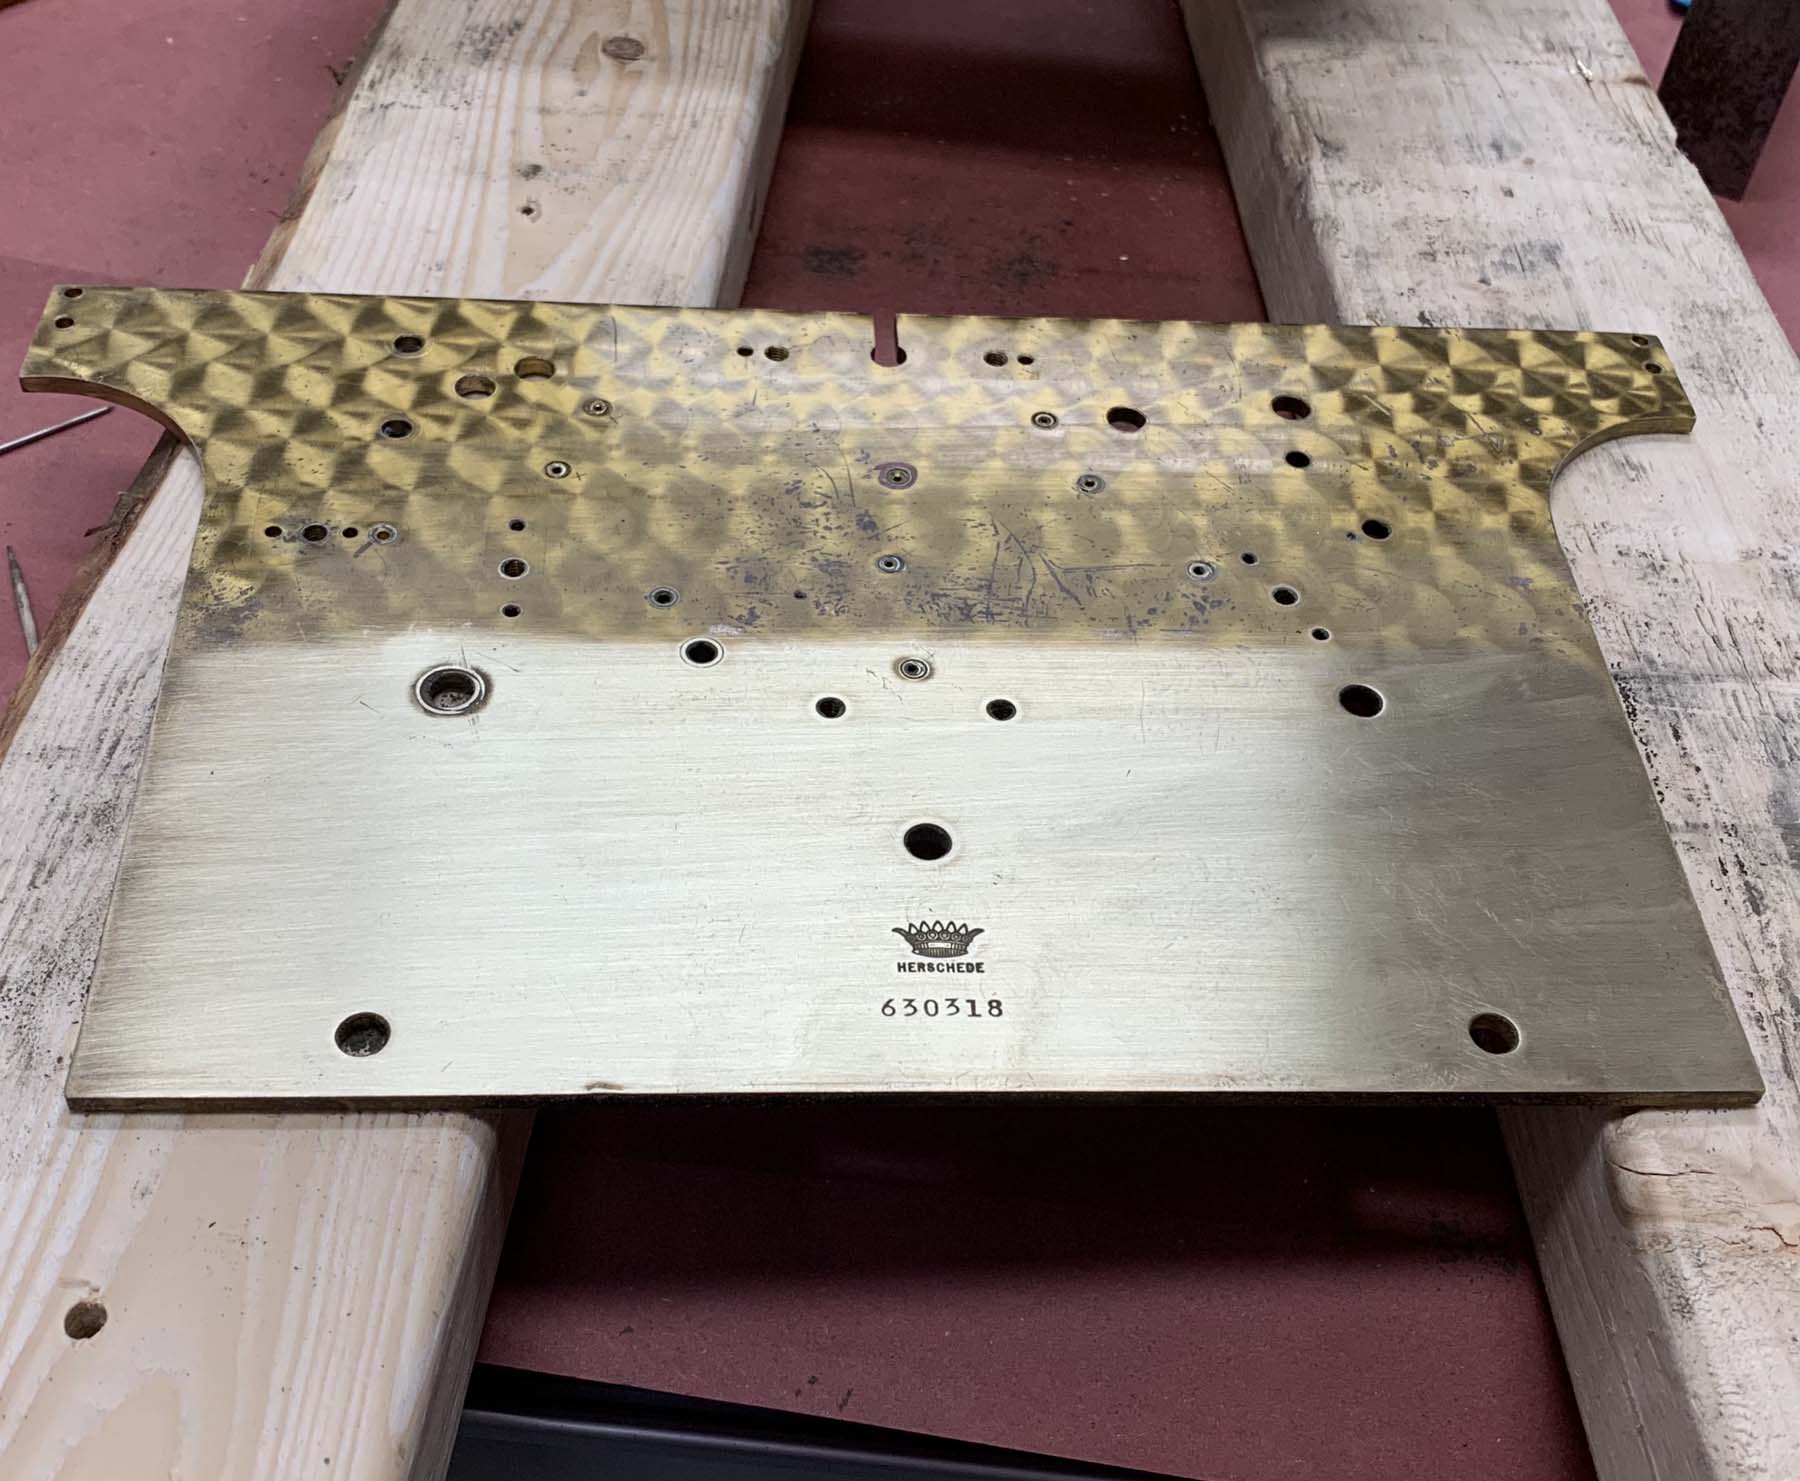
The first step was removing the old lacquer and damascening. It was not possible to save the old damascening as the corrosion went deeper than the design, so I had to sand the plates down to a bright finish. I started with 400 grit paper and finished with 800 grit. There was a bit of a pucker factor as I watched the original finish disappear. It was challenging to work around the pins on the front movement plate. I did the best I could but left a few of the most difficult areas imperfectly finished, trusting that the damascening process would do a good enough job of covering that up.
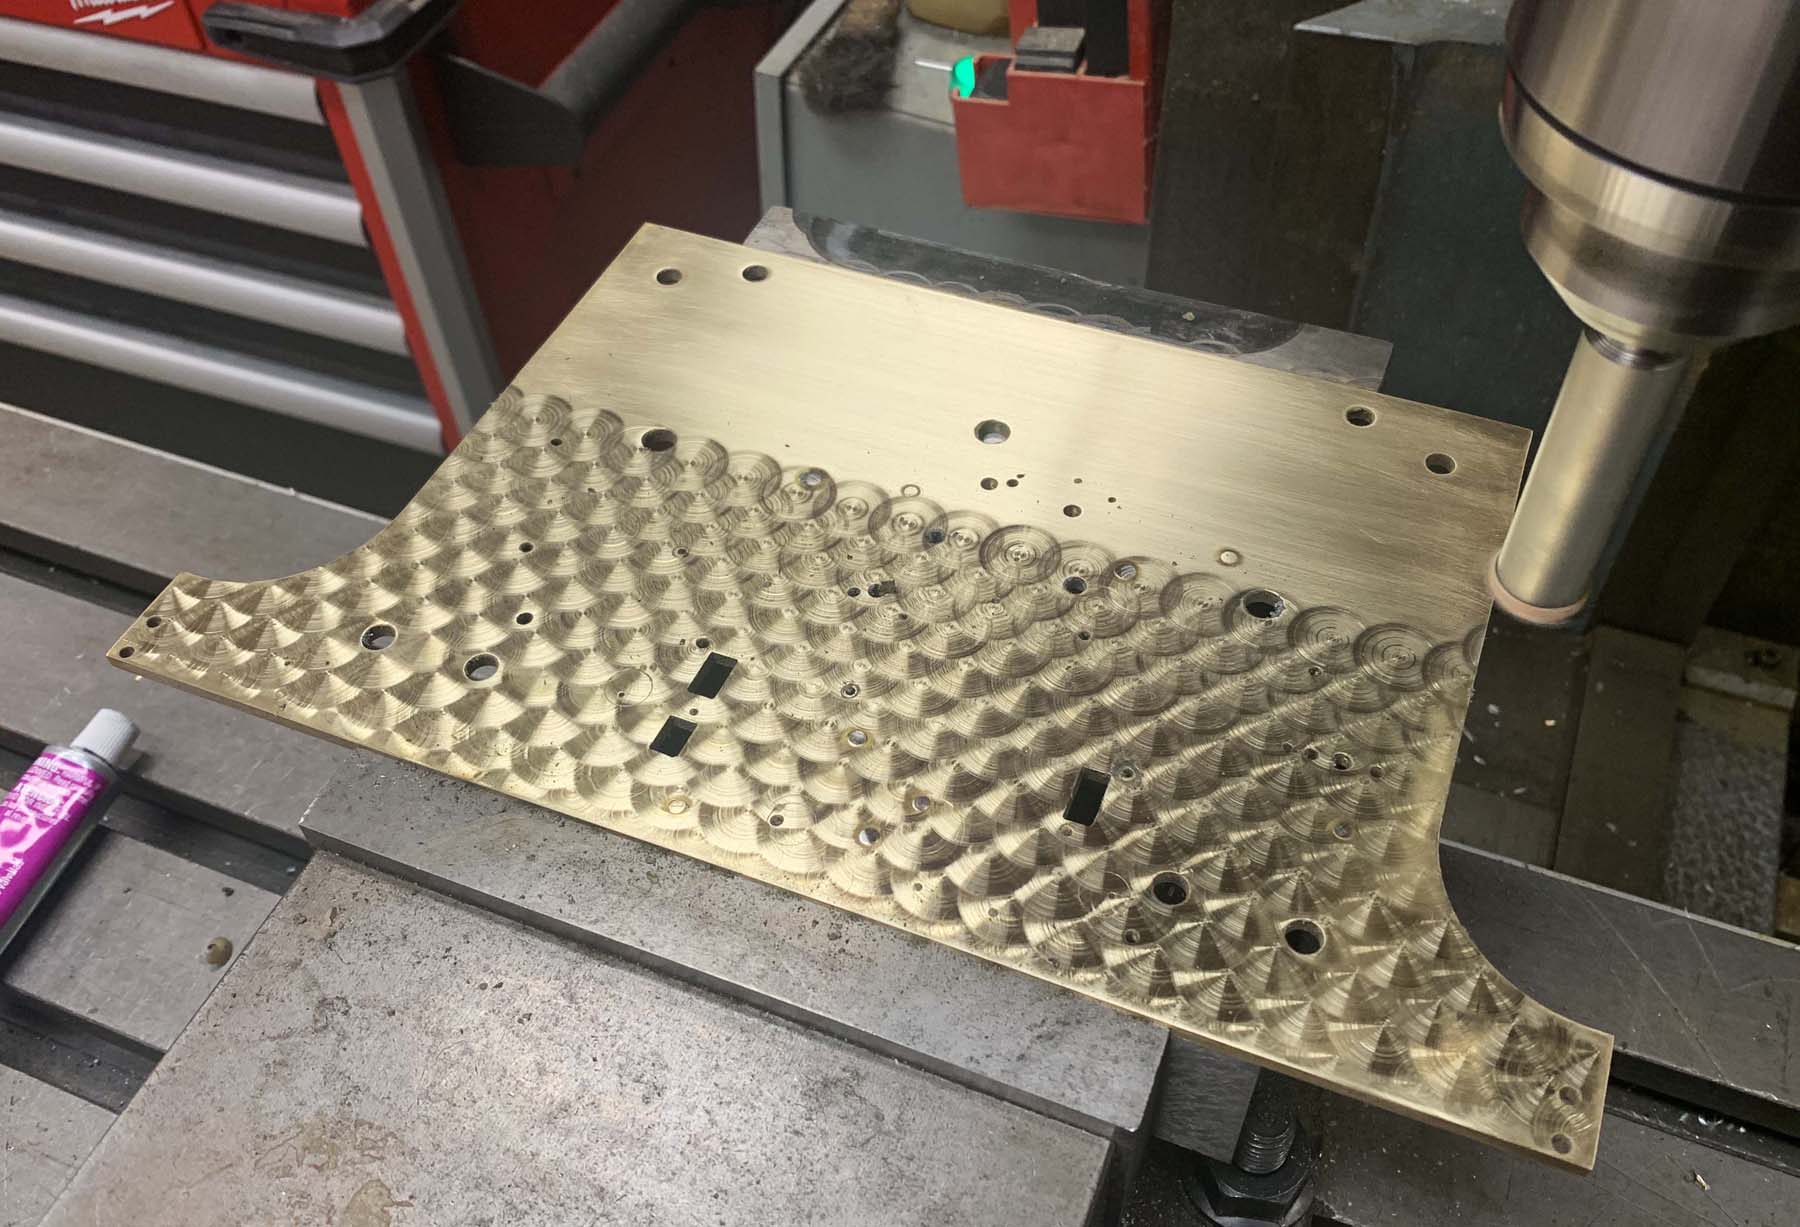
Steven Conover recommends a 5/8″ diameter piece of leather spun in a drill press with valve grinding compound as the polishing medium. He created a complicated system of shims and index lines to navigate the pattern on his drill press. I am lucky to own a Bridgeport milling machine and was able to bypass all of the external setup and just move the mill table around, though the movement plate is taller than the 6” capacity of my vise, so I had to move the fixed jaw to the other side of the vise to get it to fit.
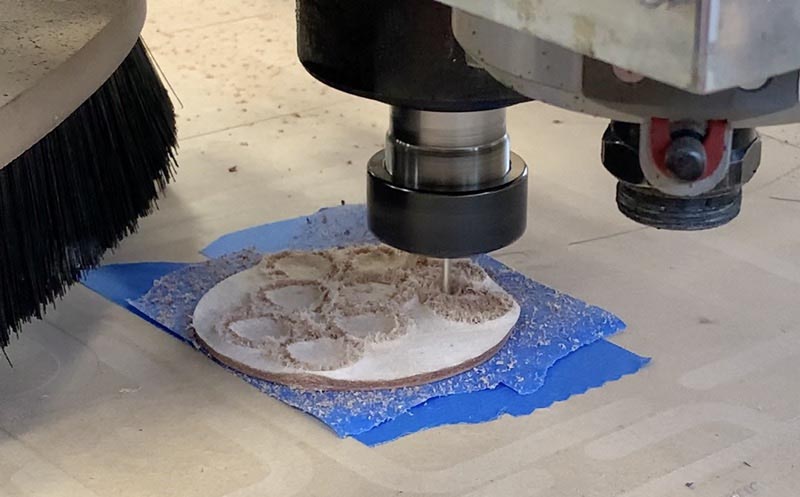
I turned a section of 5/8″ steel rod on my lathe to fit in my mill chuck. I purchased some 1/8″ thick leather pieces from a craft store and cut them to 5/8″ diameter circles using my CNC router – a gratuitous step that probably ended up taking more time than just doing it with a pair of scissors, but the CNC method was more fun. I attached the leather disks with the unfinished side down to the polishing rod with CA glue (super glue).
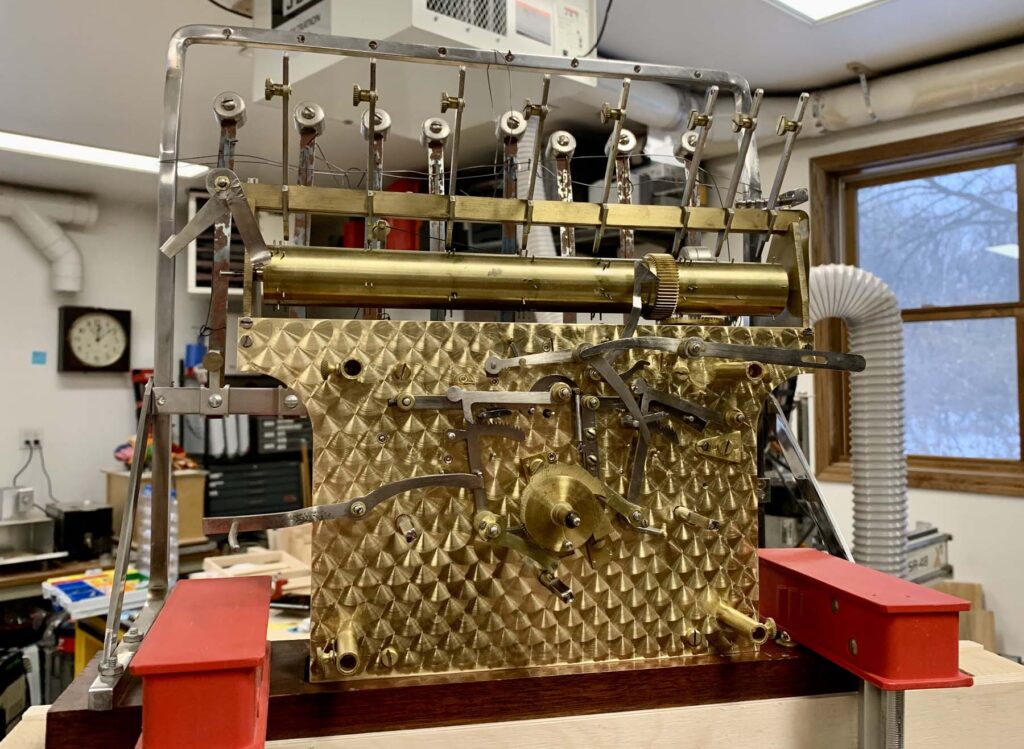
The pattern used by Herschede is 1/2″ spacing in the long direction with rows at 0.3″ offset 1/4″. This produces the beautiful fish scale pattern that almost looks three dimensional. I practiced on a spare piece of brass to get the hang of it. I found that the process is fairly forgiving about how long or how hard I pressed.
I experimented with the valve grinding compound and found that the brass grindings stuck to the polishing pad, and for the most part it was hard to tell the difference between freshly applied grinding paste and the brass grindings from prior spots. On one of the four sides there ended up being some kind of intangible difference between rows, so on my later plates I settled on a touch of paste at the end of every row. The unsupported edges required a bit of care as the plates deflect under the pressure of the burnisher, so I had to use light pressure and sometimes help with a finger to press the edge of the plate into the polishing pad so the edge wouldn’t be missed.
After finishing a side, I put gloves on, rinsed it thoroughly and brushed it with a soft plastic brush to remove any leftover grinding compound stuck in pivot holes or the damascene grain, popped it through my hot air dryer, and immediately sprayed brass lacquer to prevent any fingerprints from tarnishing the plate. Brass lacquer dries fairly quickly, so several coats only took an hour or so, followed by a couple hours of dry time before I could turn the plate over and damascene the other side.
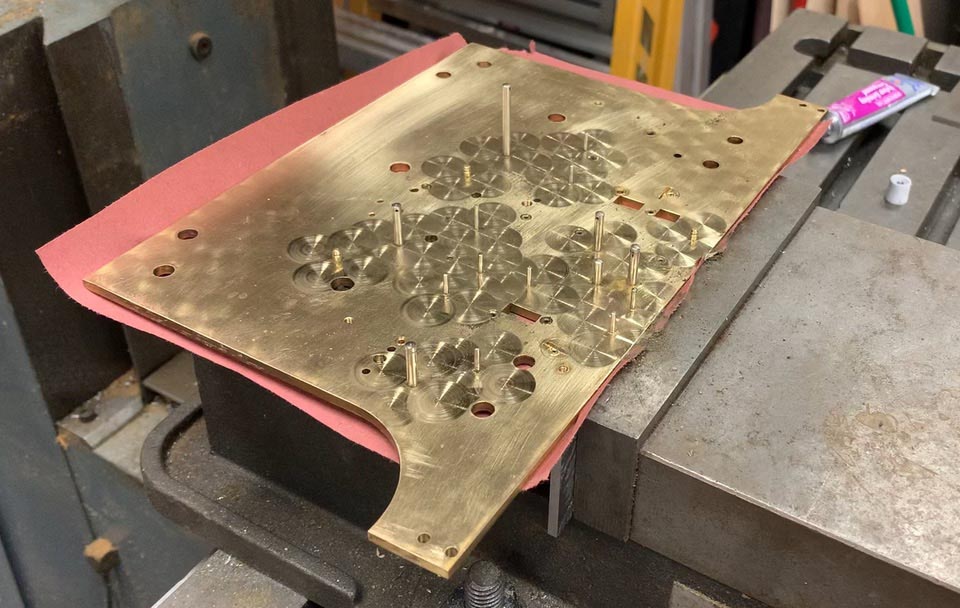
The front of the front plate has a large number of pins that are impractical to remove. Conover recommends going around each pin on four sides to fill in the space before doing the main pattern. If you look for it you can see the first pass, but it blends in nicely, and is camouflaged by the pins to some degree anyway, not to mention all of the levers and wheels that mount on those pins.
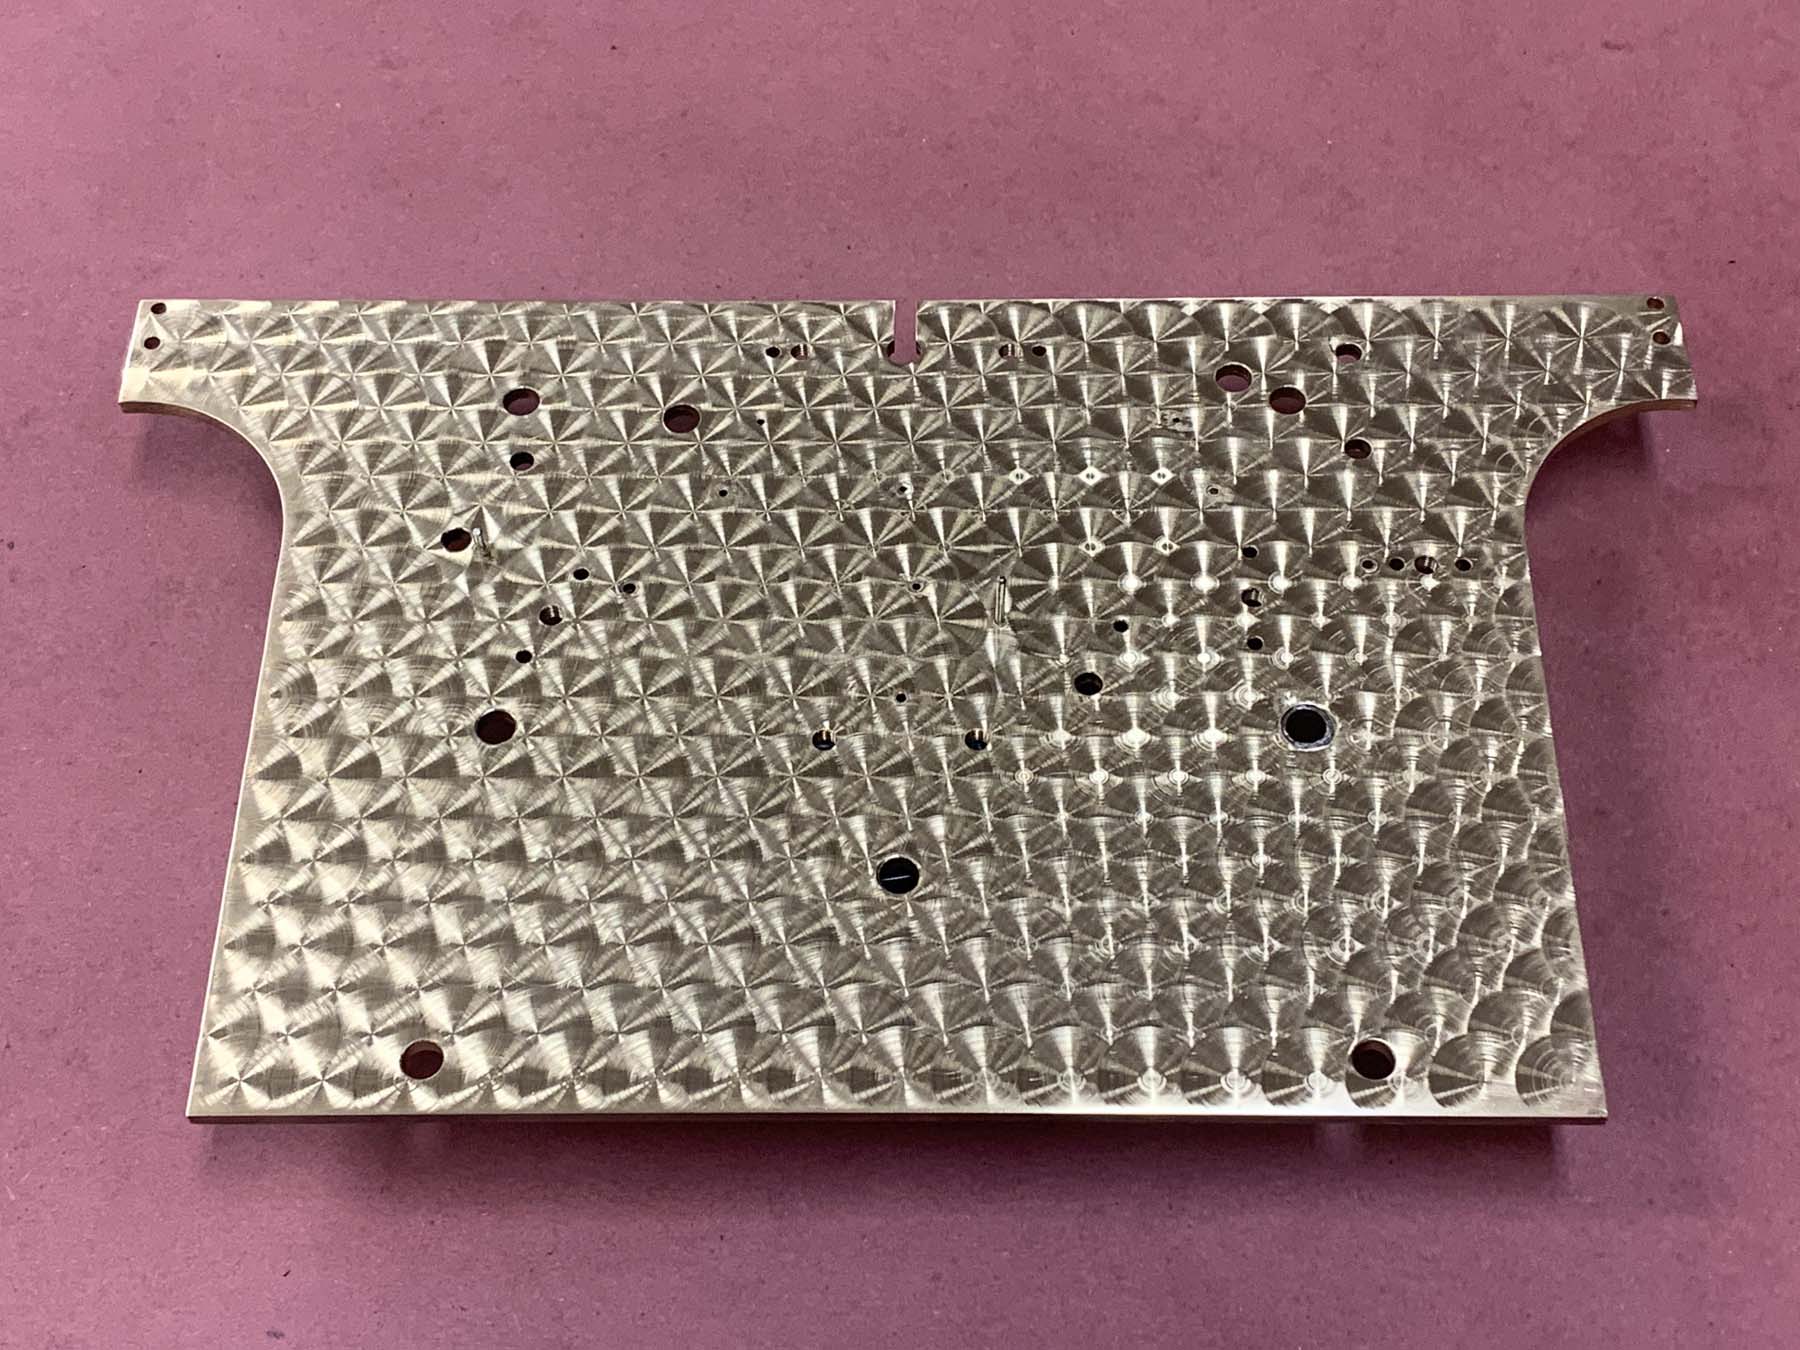
After a very thorough wet cleaning and repeated pegging of all pivot holes followed by several coats of lacquer, the plates were finished and the movement was ready for reassembly.
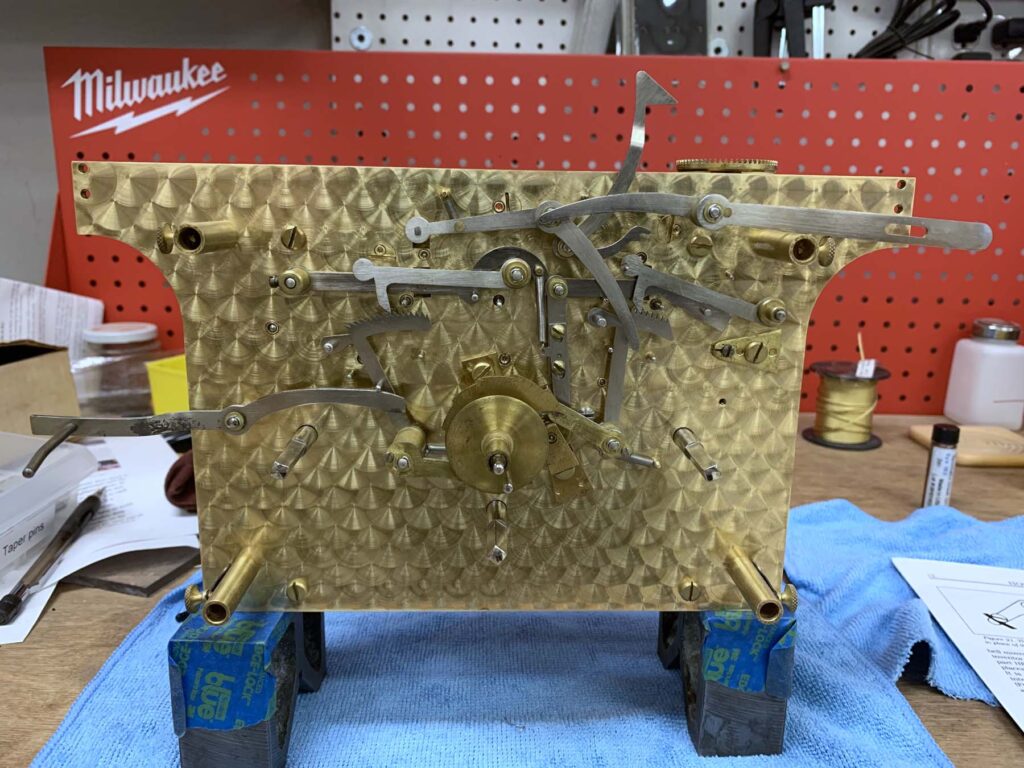
Was it worth the work? The polishing process from sanding off the old finish through damascening, cleaning, and lacquering took about six hours, not counting a little time making the tools. I don’t know how many customers would be willing to pay the extra labor charge for this functionally unnecessary step, but the movement is visible from outside the clock, and as this is a clock for my personal collection that will be around for a long time, I’m glad I did it.
2 replies on “Herschede Clock Plate Refinishing”
Hello,
We have this Herschede clock and need to sell it.
Would you be so kind as to tell me if $2500 is a fair price?
Many Thanks,
Barbara
That price is probably in the range if the clock is in good shape and operational. Values vary regionally and based on the clock’s physical and operational condition.