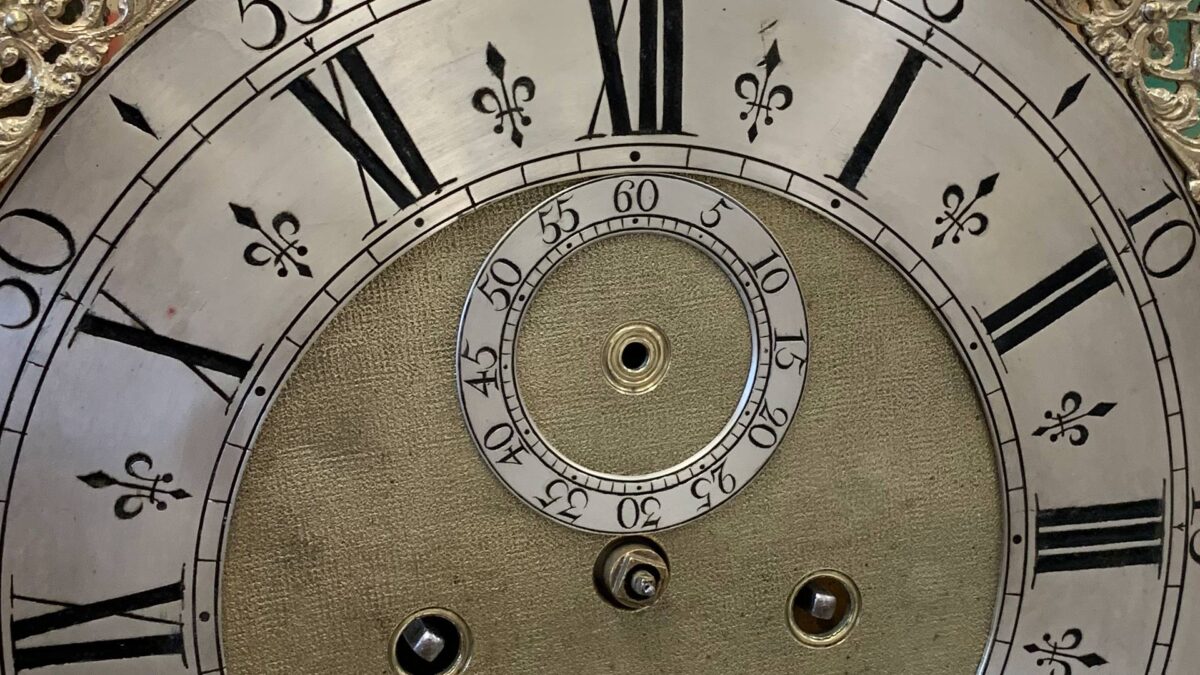
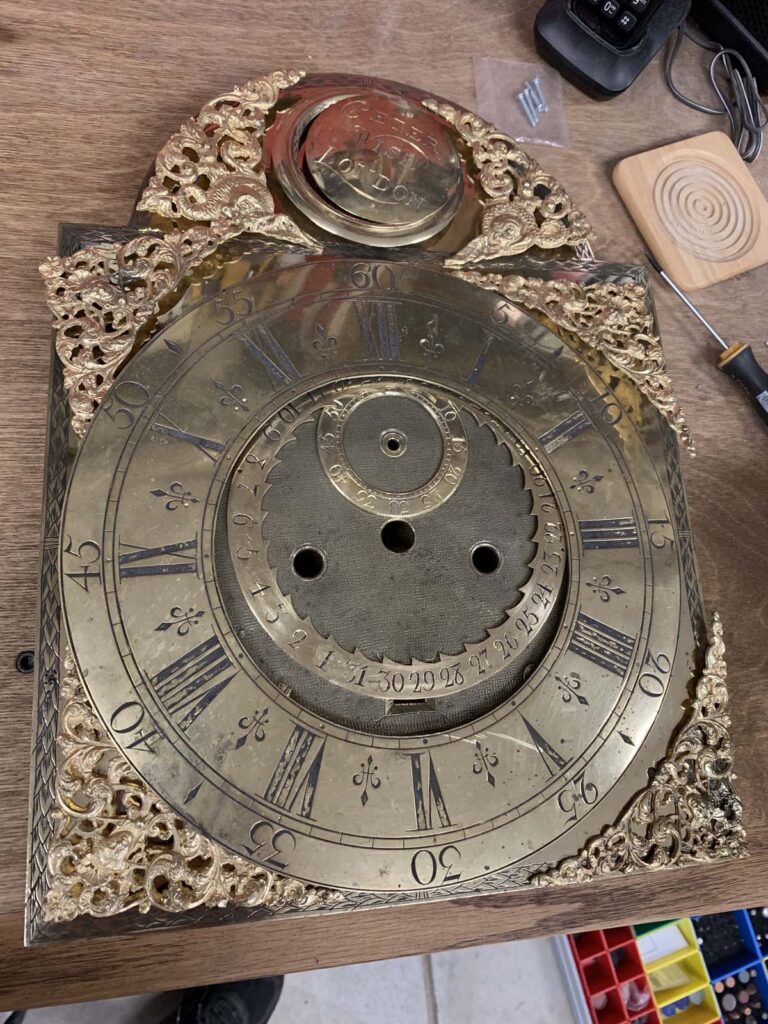
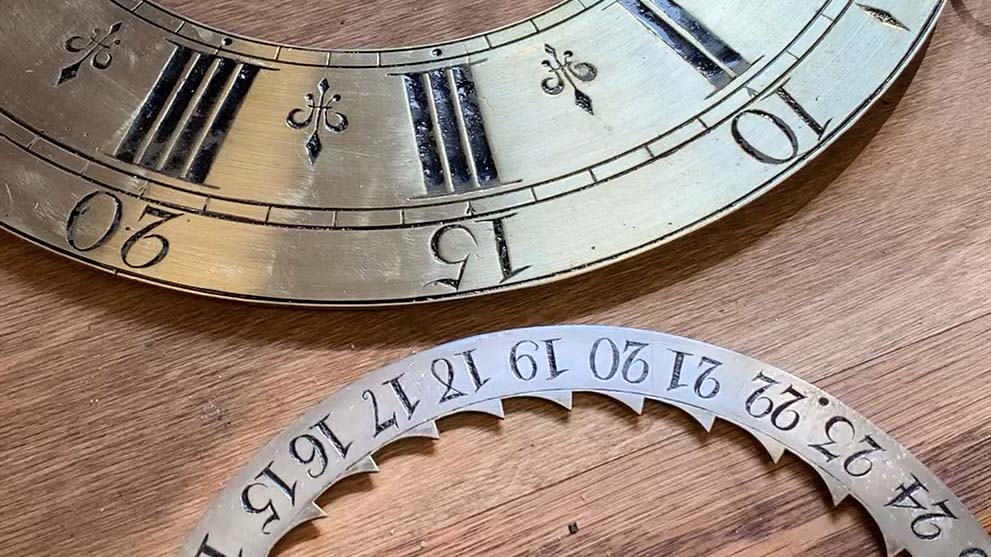
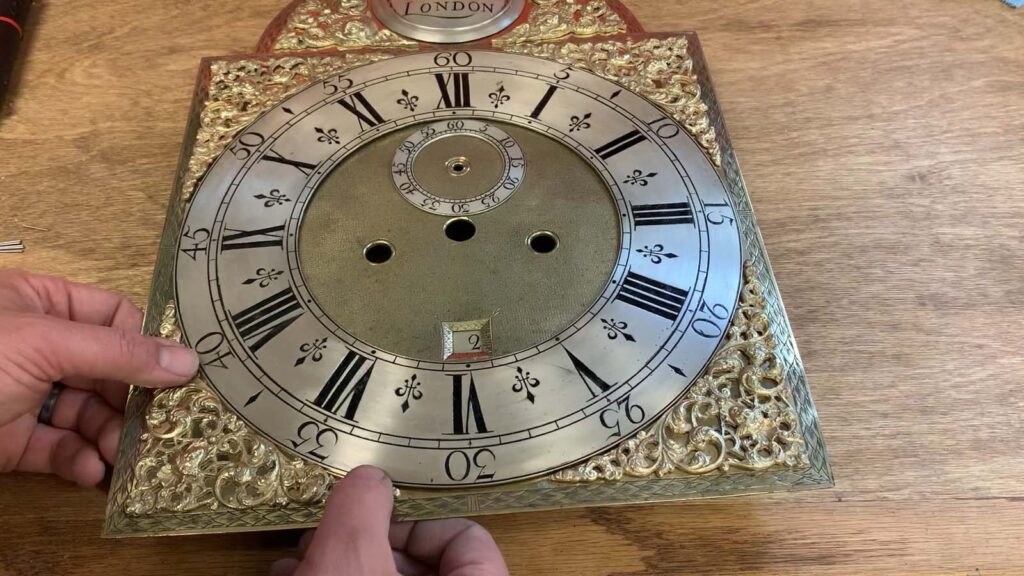
Many older tall case clocks – before maybe 1830 or so, had brass dials. These dials were built with multiple components – a brass backing plate, an hour/minute chapter ring, a seconds ring or scale, and sometimes a calendar chapter ring. In the corners are cast brass decorations called spandrels.
Brass was and is still a semi-precious metal. As early clocks were only for the well-heeled, the gleaming dials exuded luxury, which was well worth the cost. One practical problem arose with brass dial clocks – they were hard to read. Brass is a reflective, mid-tone color and the engraving often got lost in reflections, making reading the clock a chore. The solution to this problem was a contrasting metal – silver. Silver combined with black engraver’s wax is very legible, and in addition, the silver color plus the gold color of the brass dial looked grand. On money-is-no-object clocks, solid silver chapter rings or in some cases entire dials were actually constructed, but if brass was considered expensive, silver was astronomical. The remedy to this problem is what we know as dial silvering.
Dial silvering is a process where using an ion exchange chemical reaction, the surface of a brass component turns silver. Silver chloride is rubbed onto the brass component, and the silver ions come out of the silver chloride solution and trade places with the topmost layer of the copper ions in the brass, resulting in a very thin layer of silver being bonded to the brass that gives the look of solid silver without breaking the bank.
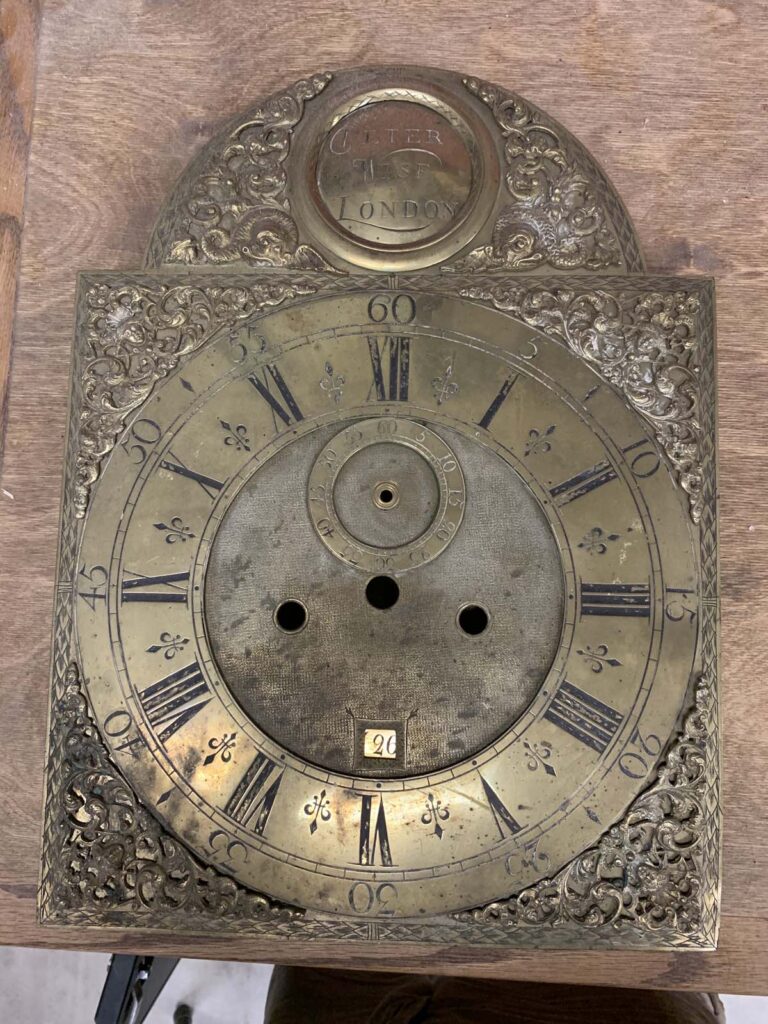
Our subject is a very old brass dial clock dating to somewhere between 1700 and 1725. It is a very high quality tall case clock made by Peter Wise of London. This 300 year old dial has more than pleasant patina; it’s a mess.
Cleaning
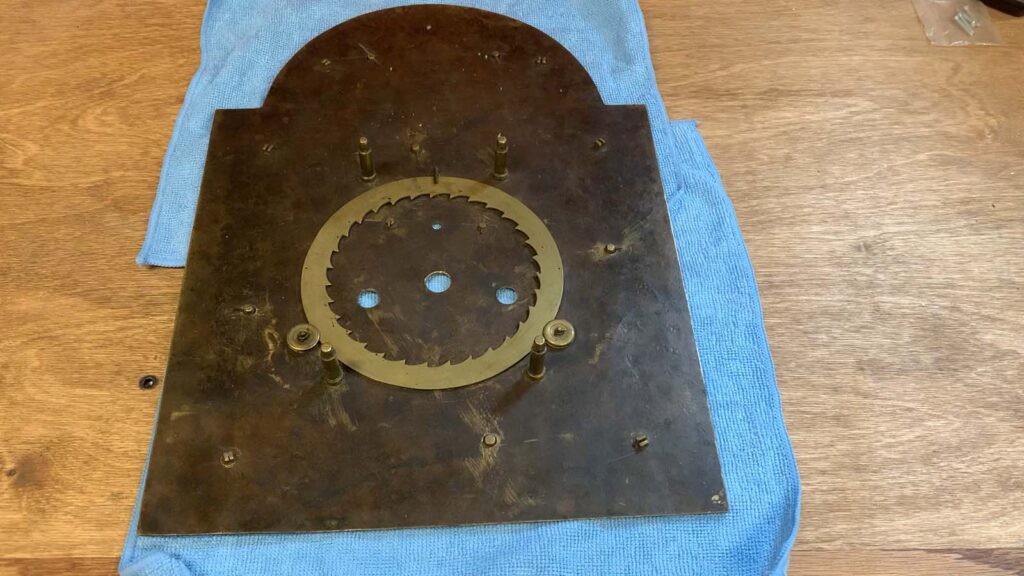
The dial components are disassembled using a combination of screws and pins, accessed from the rear of the dial plate.
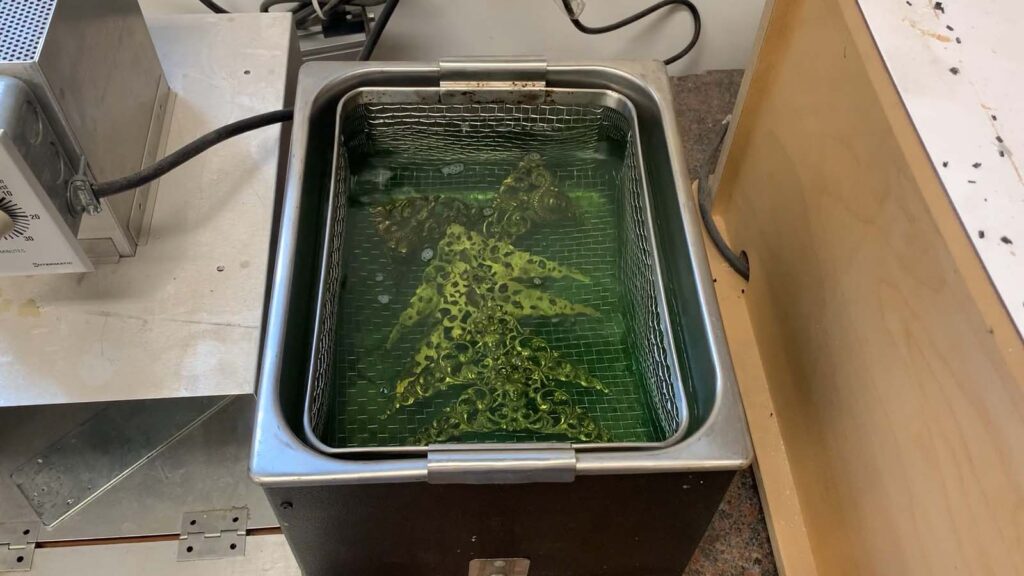
Once separated, a trip through the ultrasonic cleaner for all but the main dial plate removes some of the junk and some of the old brittle wax.
Rewaxing
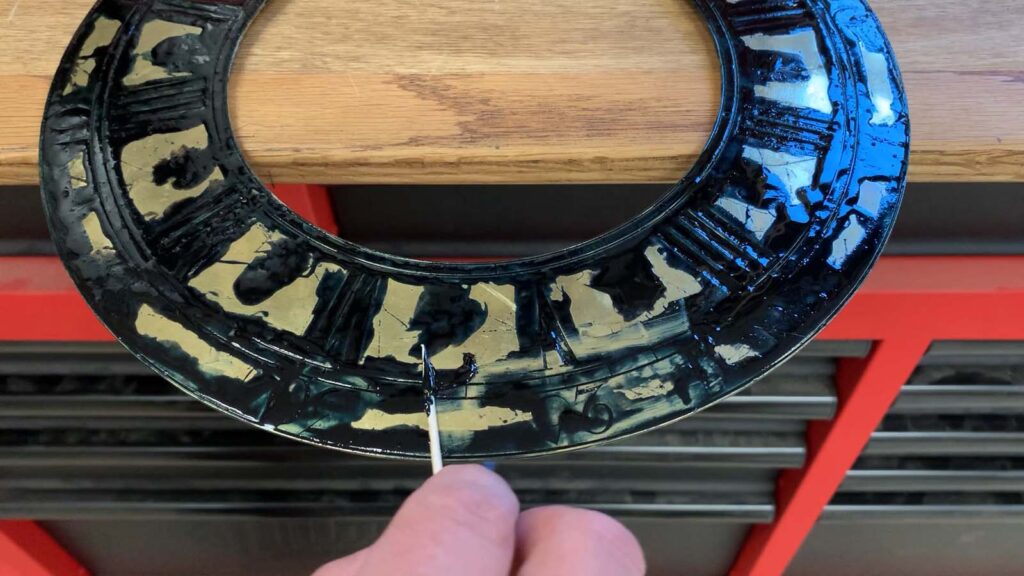
The next step involves rewaxing the dial. It’s possible that your dial may not need this step performed, but mine did. A large fraction of the original wax was missing. Engraver’s wax is available from Timesavers and other suppliers. It is essentially a black color crayon that you melt using a small torch into the engraving.

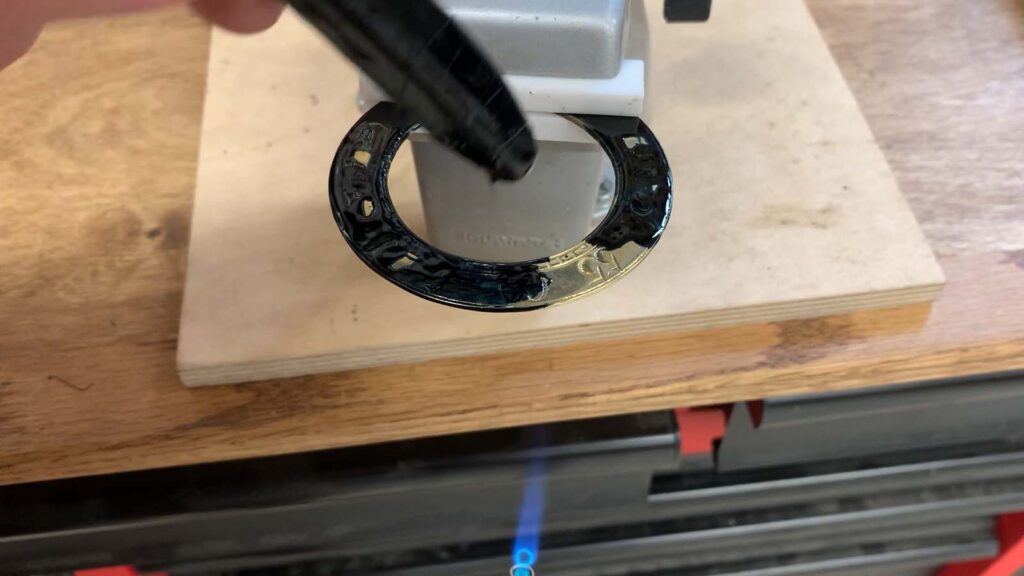
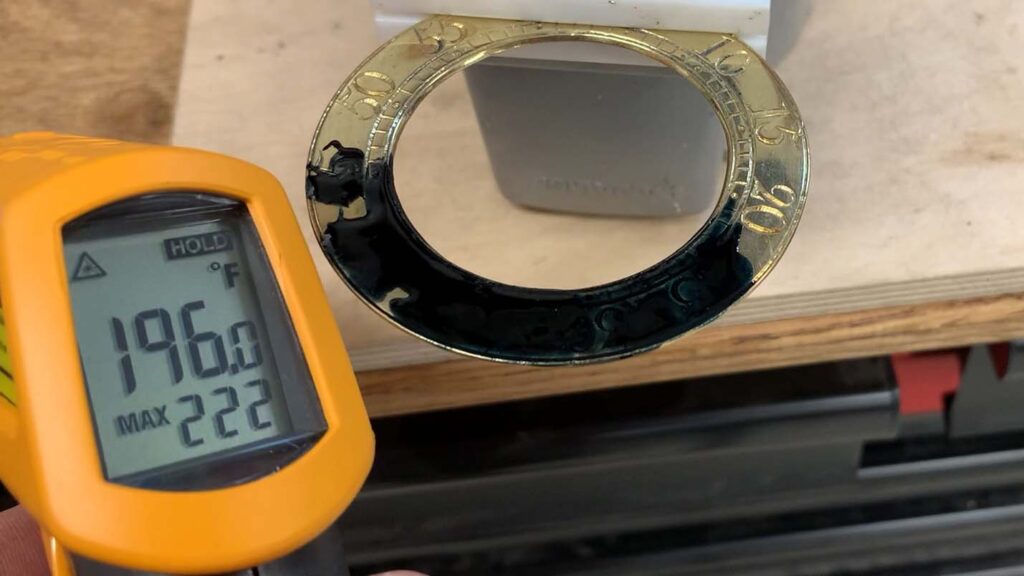
The heat must be applied to the underside of the dial so the dial does the melting of the engraver’s wax, rather than melting the wax with the torch directly. The wax is fairly forgiving; warming the dial component up to about 200˚ is what you’re shooting for. You may possibly be able to do this with a high temperature hot air gun, however they tend to heat up a larger portion of the dial all at once, whereas the torch can apply heat to a smaller area, giving more control.
The engraver’s wax does flow to a degree, but don’t expect it to flow very far; you will end up pretty much covering all of the engraving with wax from the crayon.
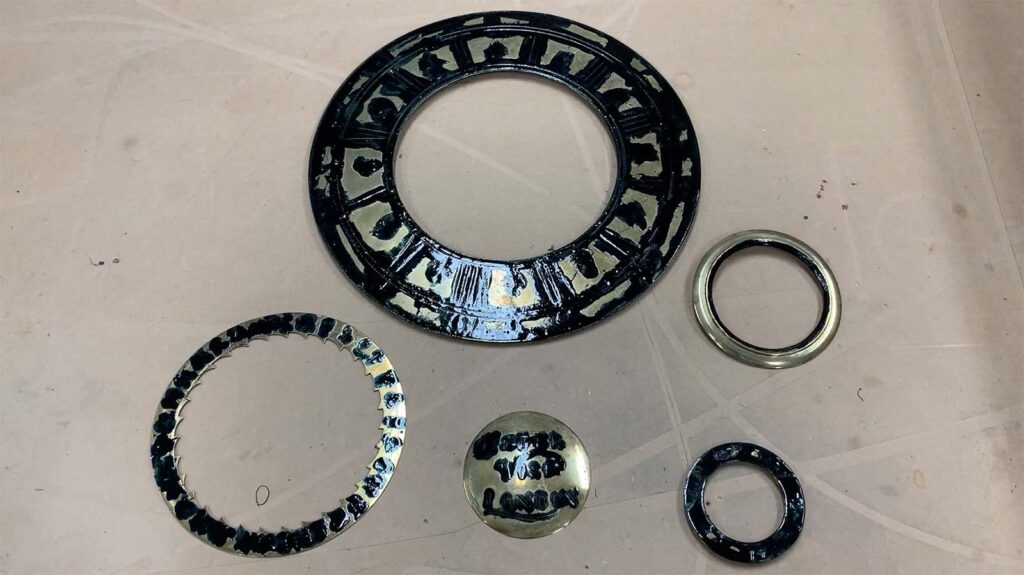
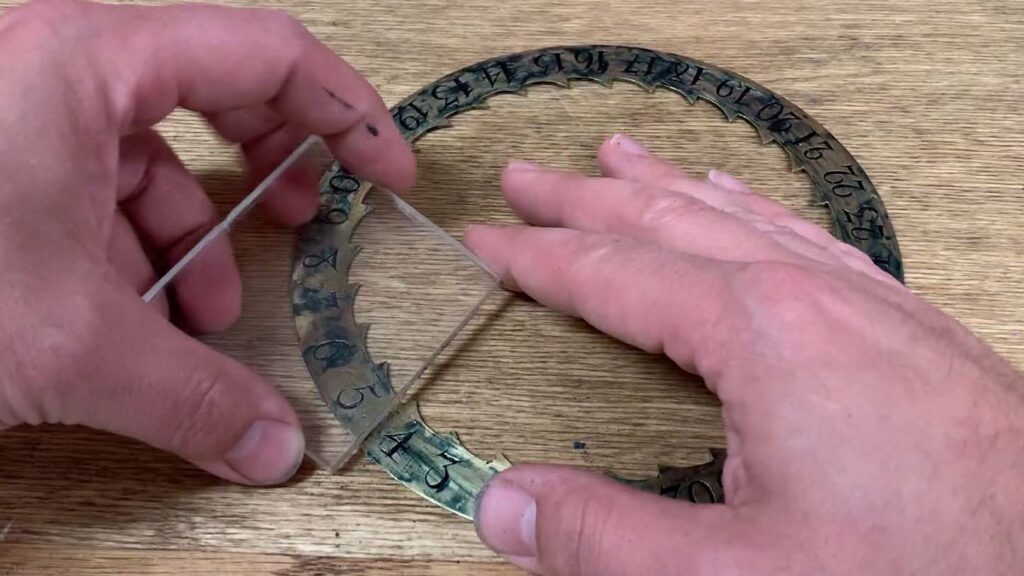
The next step is removing the excess wax. There are several ways to do this, and you may find that one works better than another depending on the depth of the engraving, and other dial features. On this dial, I fully applied all the wax, then reheated the dial component and used tooth picks to carefully draw off as much of the excess wax that I could.
After removing most of the wax with tooth picks, I used a scrap of acrylic to scrape the remaining extra wax. Mild heat to warm but not melt the wax is helpful. I sharpened the scraping edge of the acrylic by making a new cut on my miter saw. I chose acrylic because it is much softer than the brass and does not scratch the dial components.
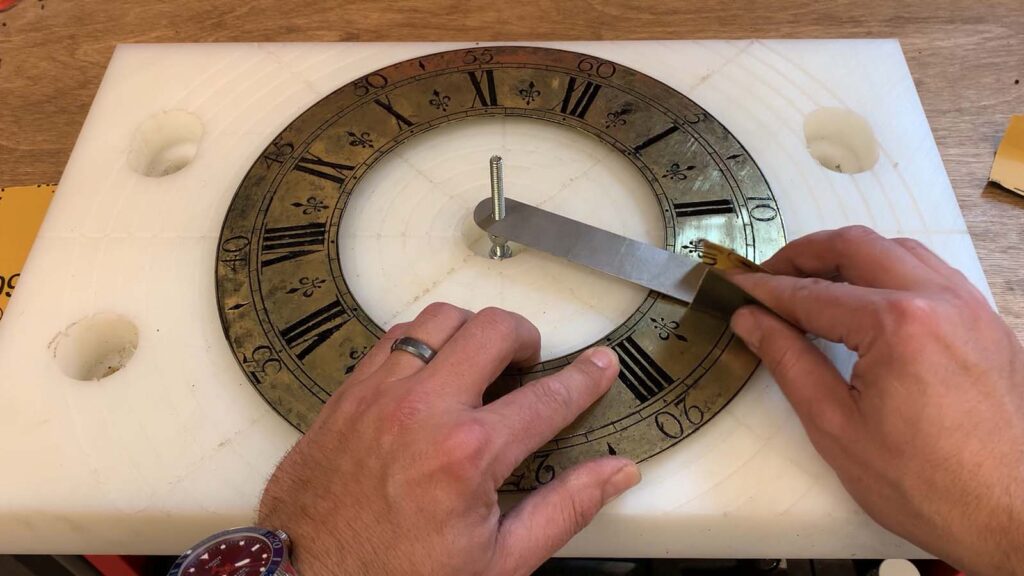
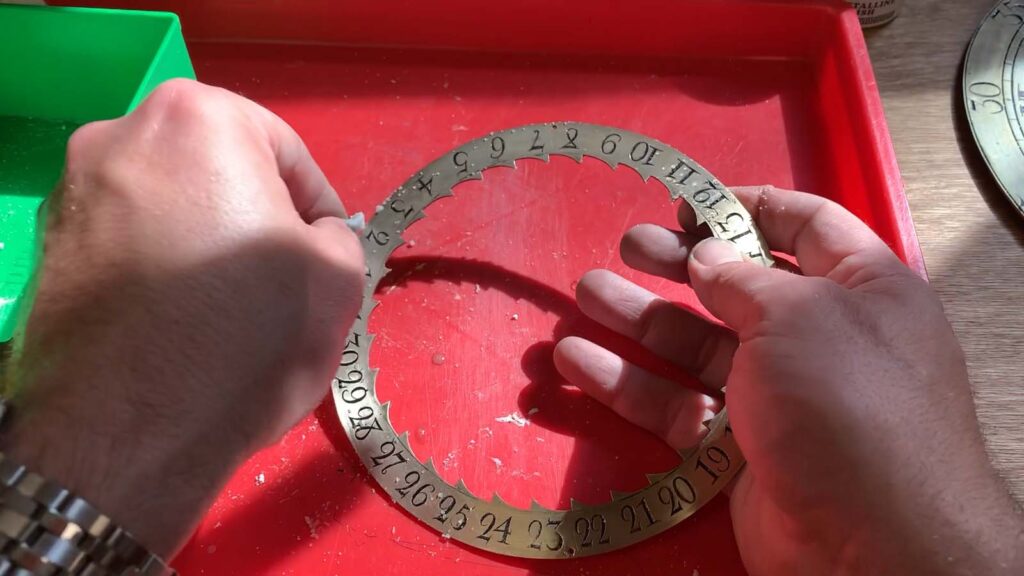
For the silvering reaction to be successful, the oxidized brass needs to be removed, revealing fresh brass. When sanding, it is important to consider the sanding direction, as it will be visible. I made a sanding jig with a center post and a flexible metal spatula. This allows me to sand around round parts keeping the sanding grain concentric with the circular parts. 600 grit wet/dry paper works well. At first, the paper will clog quickly – don’t try to use it too long or you will just end up redistributing the wax.
Silvering
The dial silvering process involves two steps – application of the silver chloride, followed by cream of tartar. The silver chloride reacts with the brass dial; the copper in the brass trades places with the silver in the silver chloride. Applying the silver chloride is easy – a damp cotton ball dipped in the silver chloride powder and gentle rubbing facilitates the reaction in a minute or two.
The results after application of the silver chloride are disappointing – the color is slightly brown. The second step – cream of tartar – brightens the silver. The application of the cream of tartar is the same as the silver chloride – a damp cotton ball and a gentle rubbing motion. The silvering sneaks up on you – it is hard to notice at first, but comparing it to an unsilvered component reveals the transformation.
I coated all of the dial components with Renaissance Wax – a museum-grade modern product that protects against tarnishing and fingerprints. Reassembly of the dial is the reverse of disassembly.
This dial is the last step in restoring this clock. I overhauled the movement a few months ago and blogged about modifying the gathering pallet.
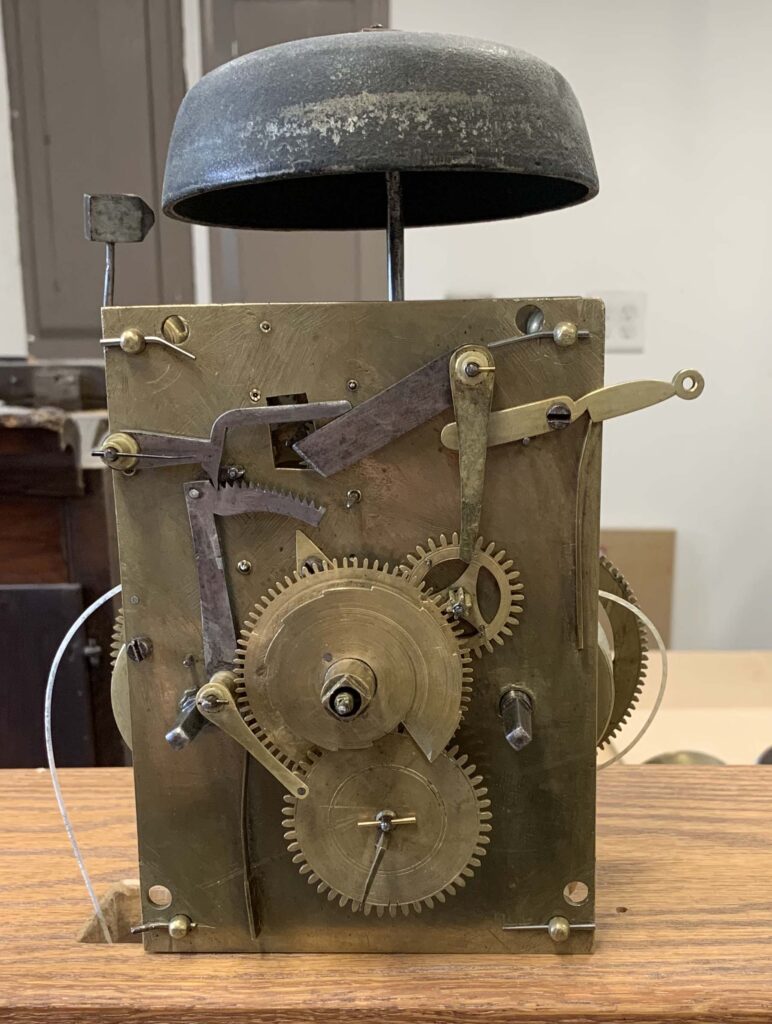
The clock is now finished and is keeping us company. These old bell strike clocks are amazing timekeepers. The clock runs accurately to just a few seconds per week.
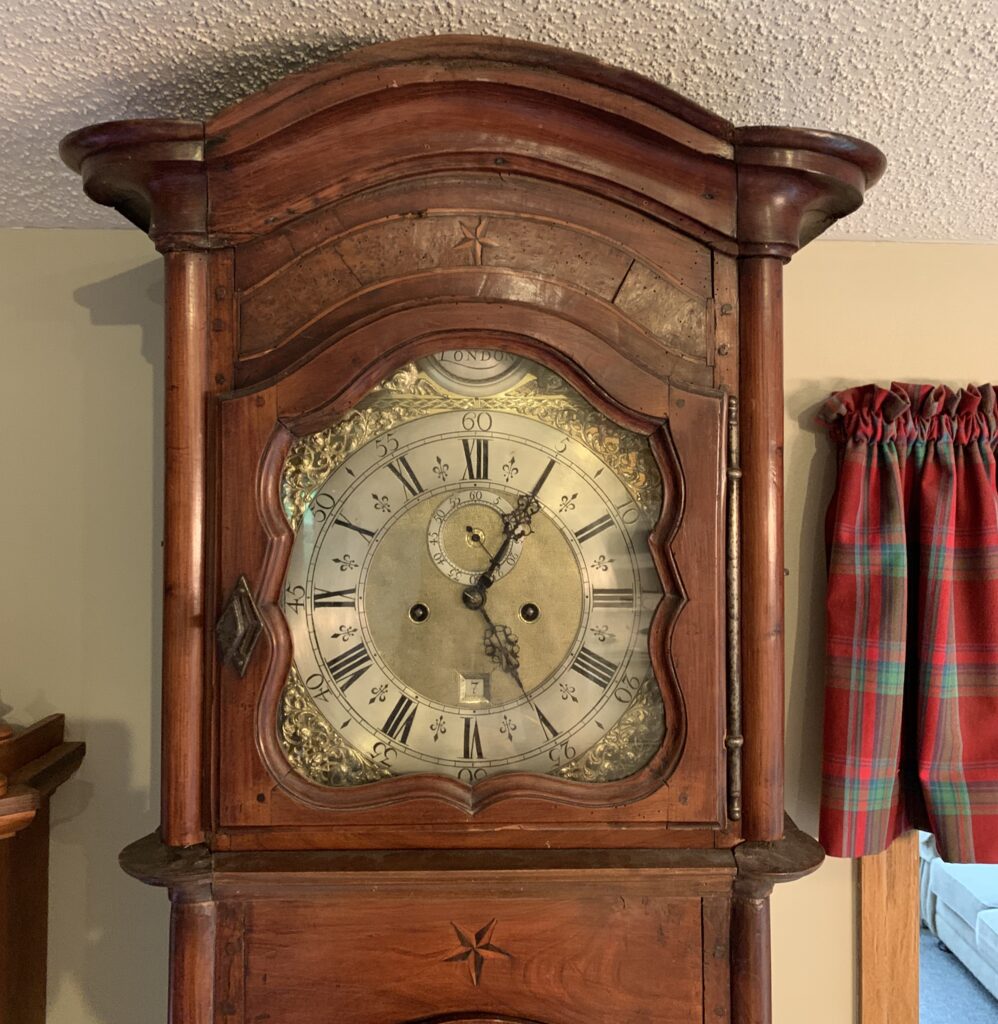
The picture below will take you a while to scroll – the clock is 99″ tall. It only fits where we have it because of the vaulted ceiling that accommodates the 3 extra inches at the front of the clock. Note the inlay work above the dial door and at the top and bottom of the lower cabinet.
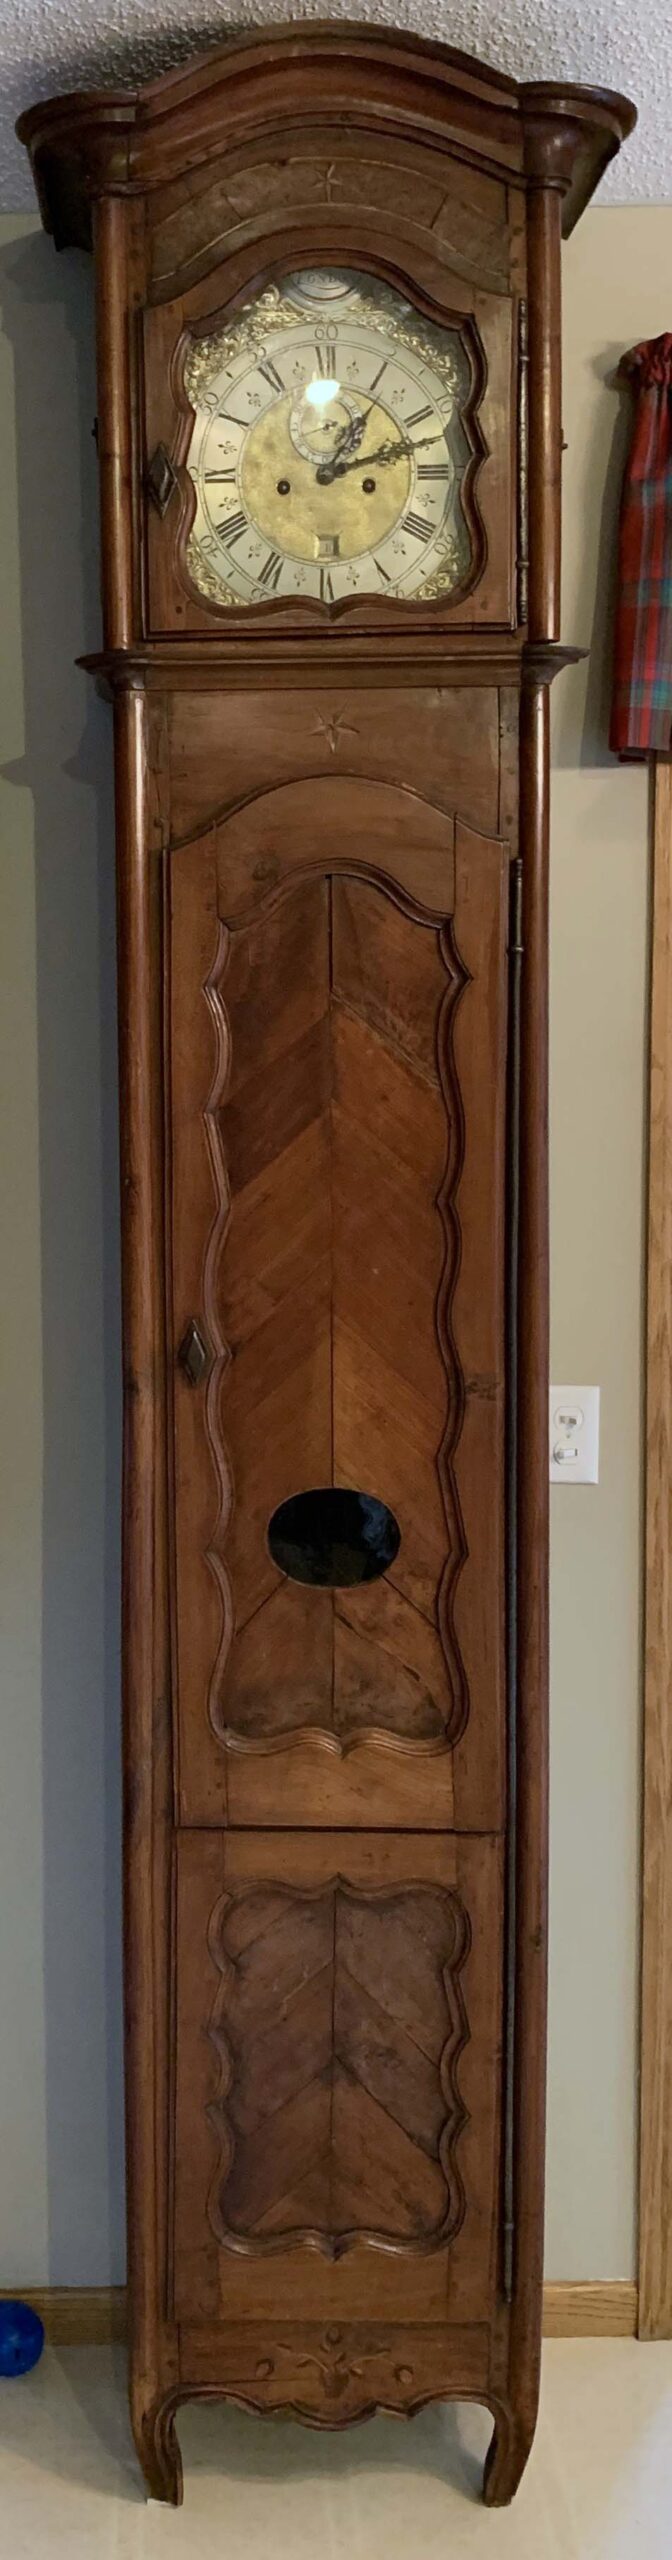
300 years is a long time. Somewhere in history the original case for this movement was lost; possibly wood worms, moisture, or a fire took their toll. For another clock, the movement was not so lucky, but the case survived. Clocks that are marriages are never as valuable as an original pair, and based on the dial shape this clock isn’t an especially convincing marriage even though the case and movement are contemporaries of each other, but it’s hard to criticize the staying power of two old soldiers that joined forces to enter into their fourth century of regular operation. Wise has been ticking away perfectly for a number of weeks now, and if I have anything to say about it, it’s going to continue for at least another few generations.
3 replies on “Dial Silvering – Clock Dial Restoration”
How long did you leave the dial after waxing and silvering before adding the Renaissance wax? I ask because I just did a dial in the exact same way but the Renaissance wax caused by black dial wax to blister and smear across the dial. Wondering if I didn’t leave it to set up long enough but in the past I have always just waited a minute or two.
The engraving wax needs to be fully hardened before applying the Renaissance Wax, but as the engraving wax precedes the silvering steps, I’m surprised you had trouble. What kind of engraving wax are you using? I have used both the wax that TimeSavers sells, as well as antique wax and have not had any issues.
Nice way and result. I did it different-with a bottle of silvering compound. Dont remember what we used for the blacking. Haven’t done this since the eighties!