
A Repair Adventure
I recently picked this clock up at an estate sale. It is a dual spring time-only movement, and the signature feature is that it runs for 90 days between winds.
I’m not sure what the case is made out of – some fine-grained wood, but it’s very heavy, which goes along with the industrial nature of this clock. This is a stately, simple clock that my wife really liked, so it fairly quickly moved to a place of prominence in our home.
The clock didn’t come with a key, so I borrowed a crank-style key from another clock and started winding it up. And I kept winding. After that, I wound some more. Initially I was worried by the easy wind that seemed to keep going and going that the springs were broken, but after shining a flashlight under the dial, I could see the springs contracting as I wound. The winding arbor is geared down pretty significantly which makes it easy to wind, even if it’s time consuming. I stopped counting after about 90 turns. The clock fired right up and started ticking away with pretty significant amplitude.
One thing I didn’t notice in the crush of people at the estate sale was the position of the pendulum bob on the pendulum rod. It was wedged with a piece of wood so the bob was about two inches above the top of the threaded adjustment section of the pendulum rod. This was curious to me, as it sure seemed like the pendulum was correct for the clock based on the size of the case and the position of the beat scale. I removed the wedge, positioned the bob mid-way in the thread adjustment area, and set the clock to the correct time. It quickly became apparent why the bob had been wedged so high on the stick – after my adjustment, the clock was running extremely slow – losing about five minutes per hour. Not five minutes per week or day, but five minutes per hour.
When I purchase a clock, unless I know the clock was recently serviced, I always presume the clock needs significant maintenance and make my bid reflective of the couple hundred dollars worth of work the clock will require to be put back into good order. Before trying to time the clock, I decided it was worthwhile to go through the movement and see if there was some other reason for the massive timing issue.
The Movement
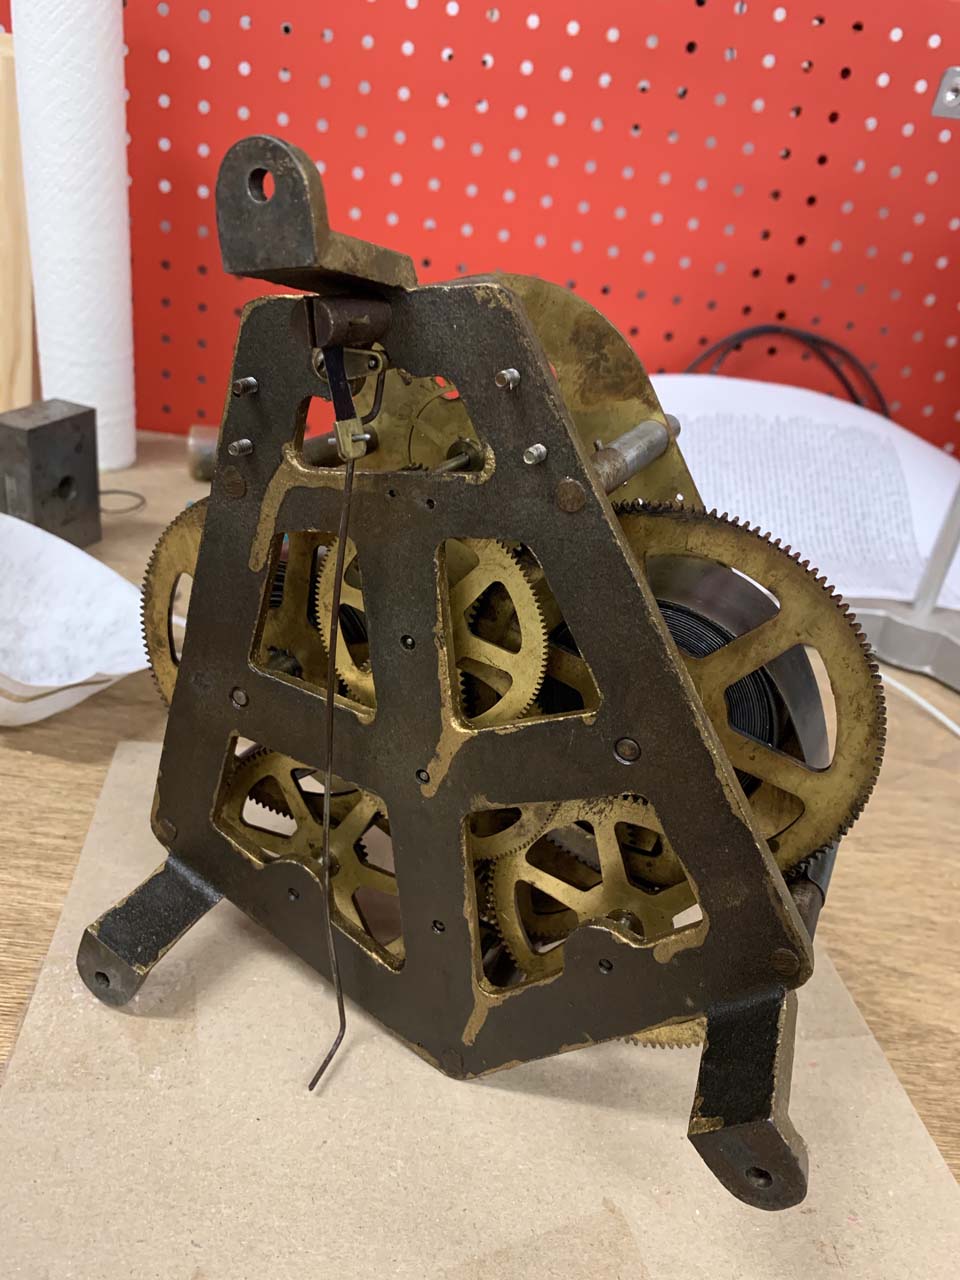
This is a significant movement. The rear plate is cast iron and the brass front plate is very thick. Somewhere along the way the iron plate was painted gold. The paint drips suggest it probably wasn’t a factory paint job. The two springs are wound from the same winding arbor via a small pinion gear driving the two spring gears. This gearing down is what makes the clock easy to wind, if time-consuming. This movement has an interesting maintaining power mechanism around the winding arbor shaft.
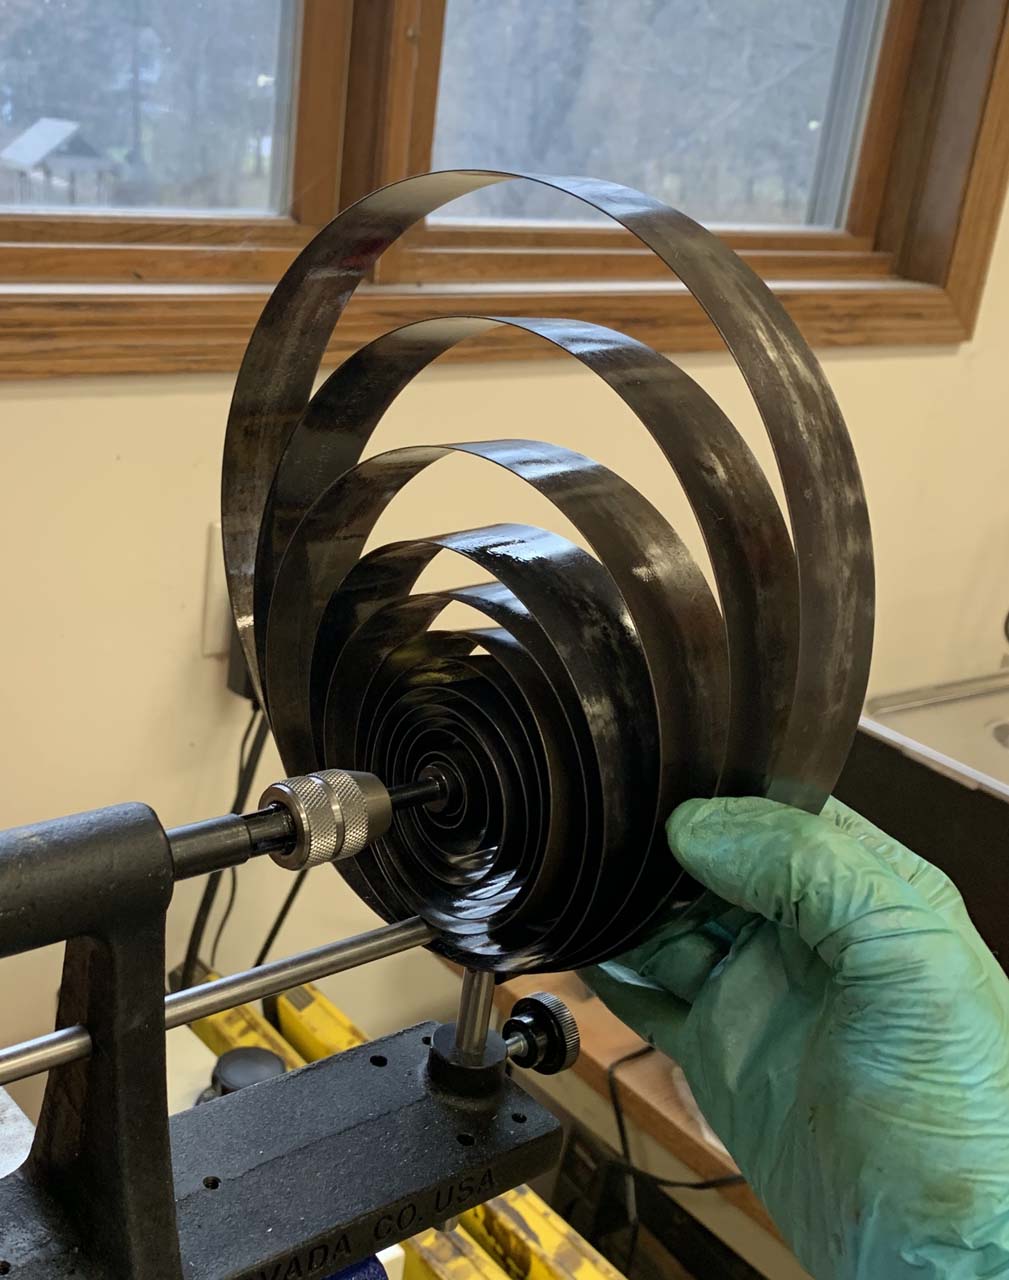
The springs are absolutely massive in all three dimensions – thickness, width, and length. They were also covered in something disgusting – either heavy lithium grease and/or used motor oil. This mess transferred itself to much of the rest of the movement and required a couple rounds of pre-cleaning to get it clean enough to put in the ultrasonic cleaner.
It’s always an adventure picking up a 100+ year-old clock – you simply don’t know the history. You can do some pre-purchase evaluation, but often you just have to get the thing apart to see what’s going on.
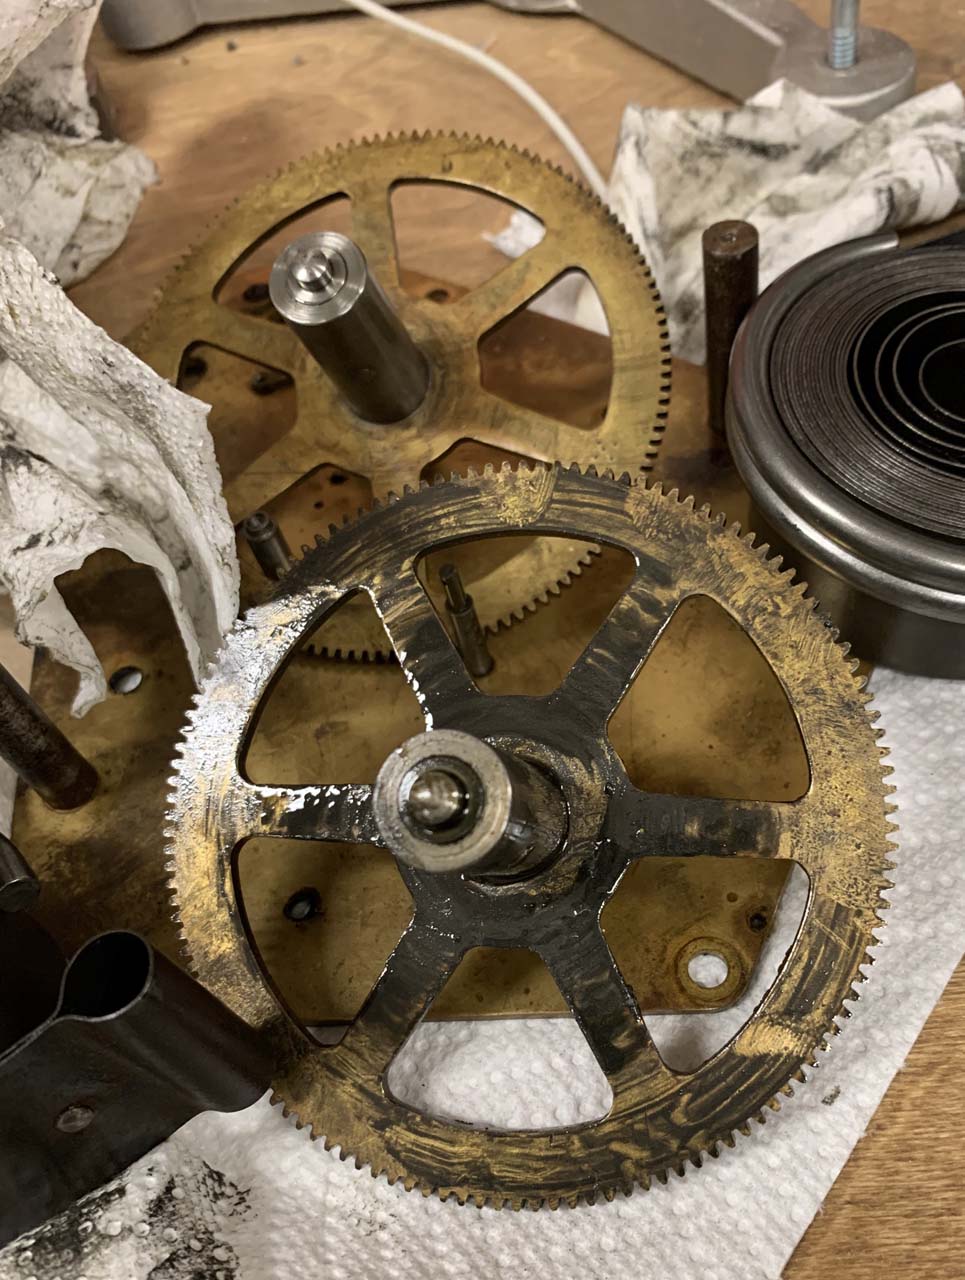
One of the common wear points for clocks are the pivot holes in the clock plates. Over time, inadequate maintenance, which tends to be the rule rather than the exception, causes metal particles from the pivots and plate holes to mix with the remaining oil (if any), and form an abrasive cutting fluid, and rather than lubricating the works, the movement starts to saw into itself. This manifests itself as holes in the plate that are oblong rather than round, and scarred and scuffed pivots. The amount of this wear tends to vary with the type of clock. European and weight-driven clocks tend to have smaller driving forces, making train wear less significant. American clocks tended to be overpowered. In the short term this made them more reliable and less fussy than arguably finer-quality European pieces as they would continue to run even past the point where maintenance should have been performed, whereas finer clocks would simply stop before enough wear accumulated to damage the clock; however in the long term, that extra power proves to be a destructive liability.
Because of the enormous springs in this clock, I was unsure what I would find, but to my surprise, the clock didn’t have enough wear on the train to warrant any bushing work; a quick polish job of the pivots was all the clock required. The good condition of the movement is largely attributed to thoughtful design of the clock – the shafts on the high-power part of the movement are pretty massive, and have apparently been well-sized to the application.

The movement was badly tarnished. I have spent time trying to decide how much refurbishment time and effort makes sense for a clock. The state of polish of the movement doesn’t affect its operation and for clocks where the movement isn’t visible, I have struggled to get excited about the couple hours-worth of extra work a full polish job takes. In this case though, the main plate was too gross to leave alone. I didn’t fully polish the whole movement, but I wanted at least the visible parts of the assembled movement to look passable, and put a coat of lacquer on to try to keep it that way a little longer.
Timing
The movement reassembled without issue, and back it went into the case. I didn’t find anything during maintenance that would explain why the clock ran so slow. Surely something must have been lost or changed over the decades, but I don’t know what. There is only one set of mounting holes for the movement in the back of the case, so I’m pretty confident the movement and case are original. It seems likely that the pendulum has been replaced, but I struggle thinking that they would have put a materially shorter pendulum in this large case – the one in there now looks in proportion, and shortening the rod would make the stick well short of reaching the beat scale. I decided to try to add weight to the top of the pendulum to move the center of mass higher and speed the clock up.
Uh oh, math!
It is intuitive to anyone who has ever played with a yo-yo, a yard stick, or any other swinging thing that the speed of the swing is related to the length of the pendulum. What’s less clear is what that relationship is. It’s not a linear relationship; a pendulum twice as long won’t swing twice as slowly. A standard seconds-beat (each tick is one second; the total period – back and forth – is two seconds) pendulum is close to 1 meter long – about 39 inches. If I wanted to make an extra large clock with a pendulum that took two seconds per tick, that pendulum would need to be almost 4 meters long – 13 feet.
While it is intuitive that longer pendulums swing slower than shorter ones, it’s less intuitive that weight does not automatically translate into a rate change. In fact, as long as the weight is evenly distributed above and below what’s called the radius of oscillation, a 10 pound pendulum will have the same rate as a 1 pound pendulum. What matters is where that weight is. When you adjust the rate nut at the bottom of your pendulum, you’re not adding or subtracting weight to the pendulum; what you’re doing is changing the radius of oscillation by moving the center of mass of the pendulum up or down. It turns out that adding weight, as long as it’s above the radius of oscillation, actually speeds up the pendulum.
Now what?
Other factors like the distribution of mass of the pendulum affect the timing, so instead of trying to calculate something very difficult, I decided to start experimenting.
I had absolutely no idea how much weight would be required to make up 5 minutes per hour of rate, so I found the thickest piece of sheet steel I had and cut a pair of slabs to go on the front and back of the pendulum rod as high as I could get them. That helped, but I went from 5 minutes per hour slow to maybe 4 minutes per hour slow.
I added two more layers of steel, which brought me about halfway – I was now around 2 minutes per hour slow.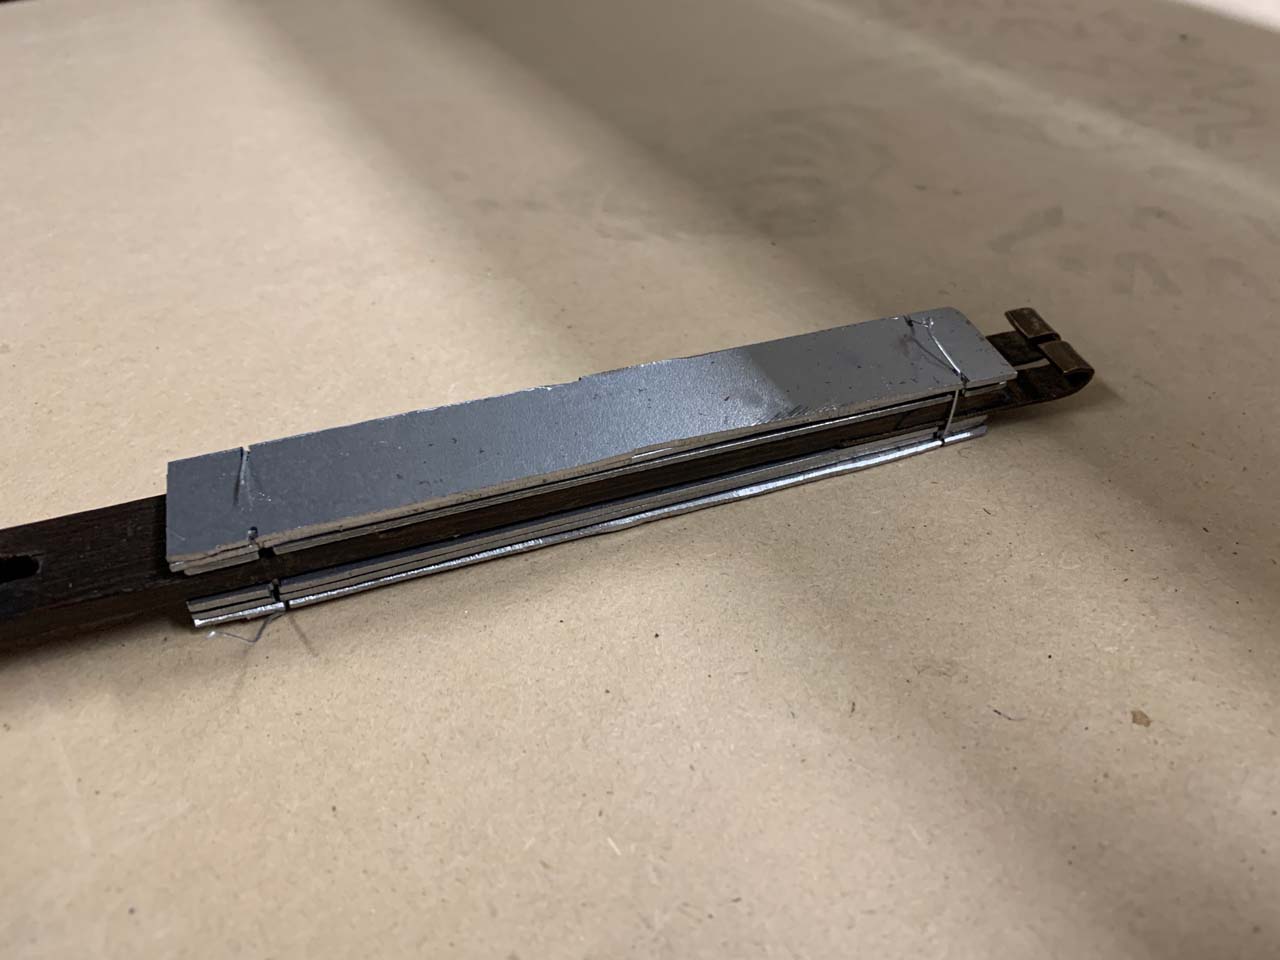
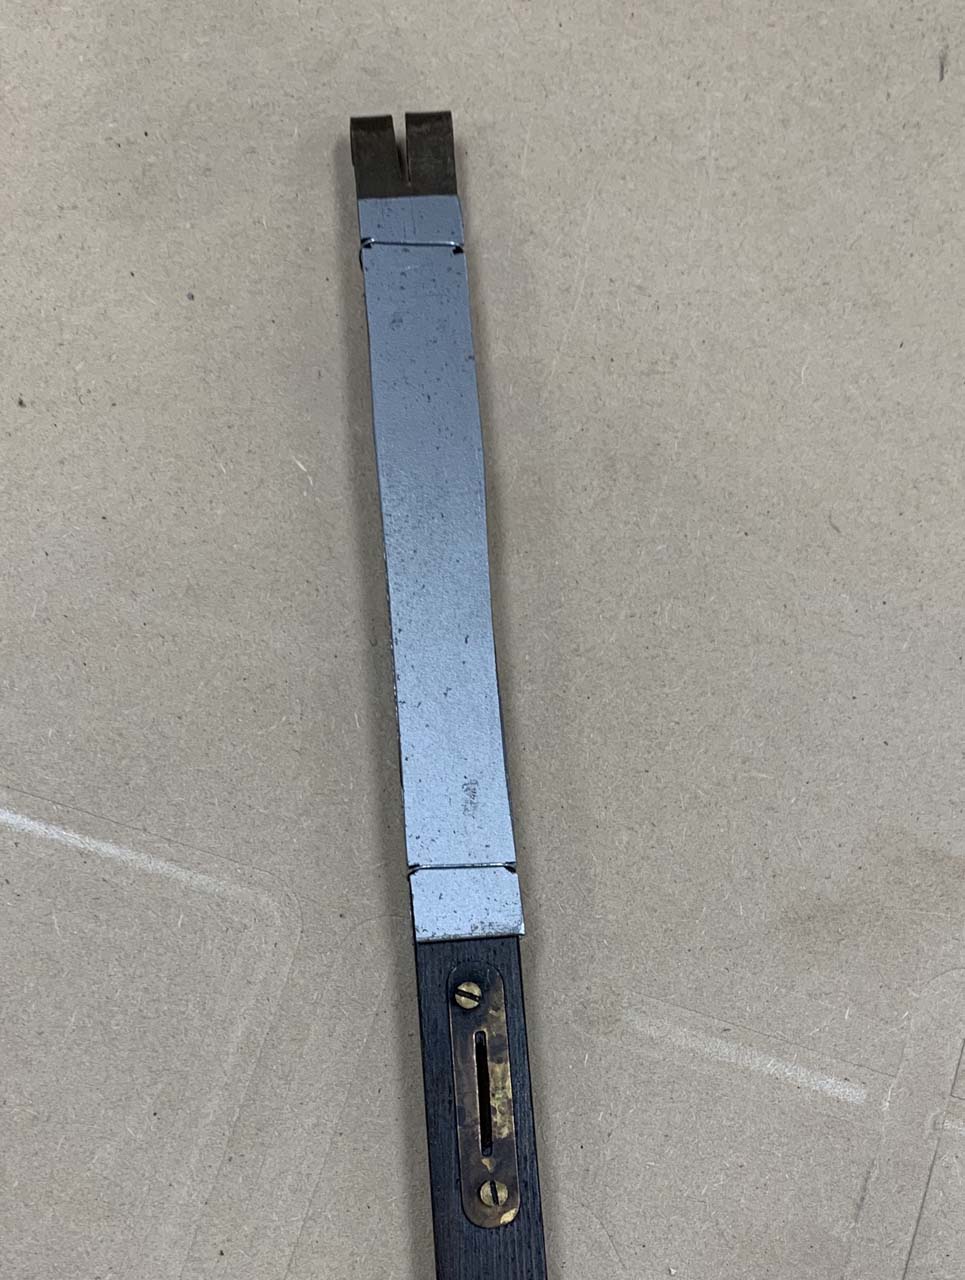
Clearly desperate times call for desperate measures. I didn’t have any spare lead around and I was running out of clearance around the pendulum rod, so I decided to go wider rather than thicker. My next attempt was using 1 1/2″ wide 1/8″ thick steel bar. In order to keep the pendulum in balance, I also needed to make spacer pieces to keep the weight centered around the pendulum bob.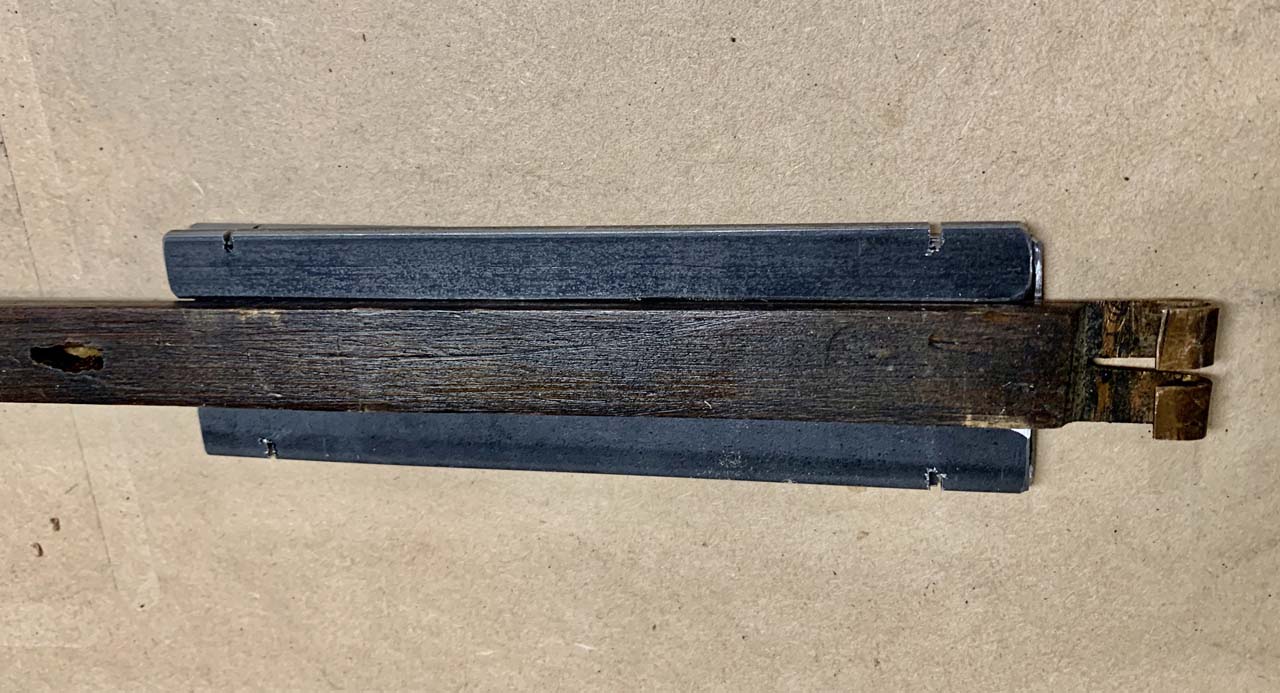
Here is the final version.
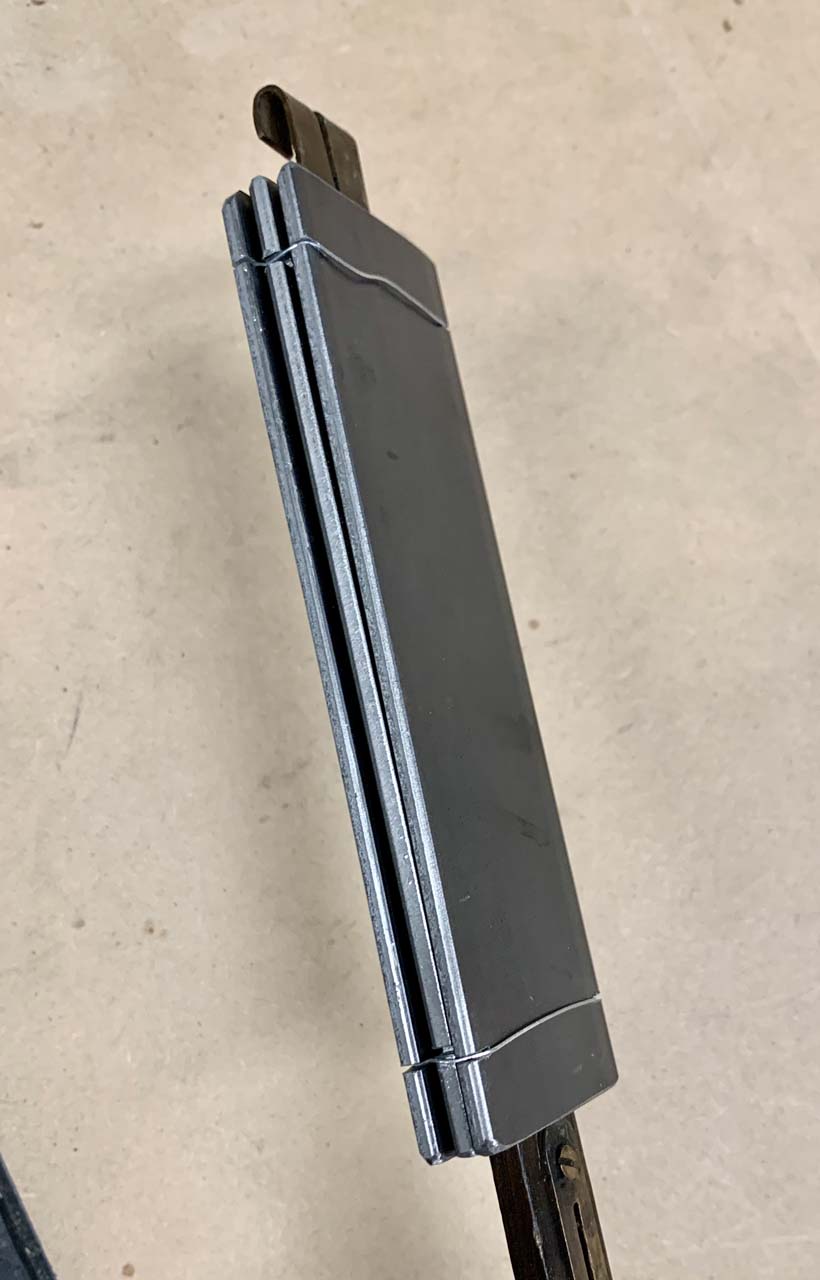
It turns out that even this much weight was barely enough. The clock was now keeping time, however the bob was all the way up on the rating screw. It would have been nice to be able to move the bob down another 3/4″ to be more centered on the rating screw, but I felt like I was about at the end of how much weight I could add to the pendulum without it being ridiculous, so I decided to quit while I was ahead, and added a couple small magnets to my weight plates so I could get at least a couple turns of adjustment on the rating screw to regulate the clock.
I think my eventual solution ended up working pretty well. It’s not visible from outside the clock, and the weights are held on by wire so I haven’t done anything irreversible to the clock. I’m glad this clock has so much power though – I’m not sure that most clocks would have been able to handle the extreme amount of added weight, and I’m not at all confident that I didn’t negatively affect the physics of the pendulum operation that causes the clock to not be as accurate as it would have been with the correct pendulum installed, but hey, it works. Someday I will make a new second hand – the one that came with the clock is broken and probably not the original style, but for now, it’s in operation.
Thanks for riding along on this unique adventure. It was a first for me, anyway.
Update!!! Take a look at part 2 of this repair adventure – Lockwood Almquist Revisited.
2 replies on “Lockwood Almquist 90-day”
Hello, I have a clock very similar. Were you able date yours? This was my grandfather’s clock and my first. How do you know how old a clock might be?
Thank you, Michele
I know very little about the history of Lockwood Almquist. It appears to be from approximately the turn of the 20th century based on construction similarities to other clocks of the period, but it could be anywhere from 1880 – 1930.