I recently purchased a collection of clocks from the estate of a longtime collector and have begun to go through them. Some will likely stay in my personal collection, but I need to send on a few that I don’t have room for. First on the list is this interesting Mission-style tall case clock.
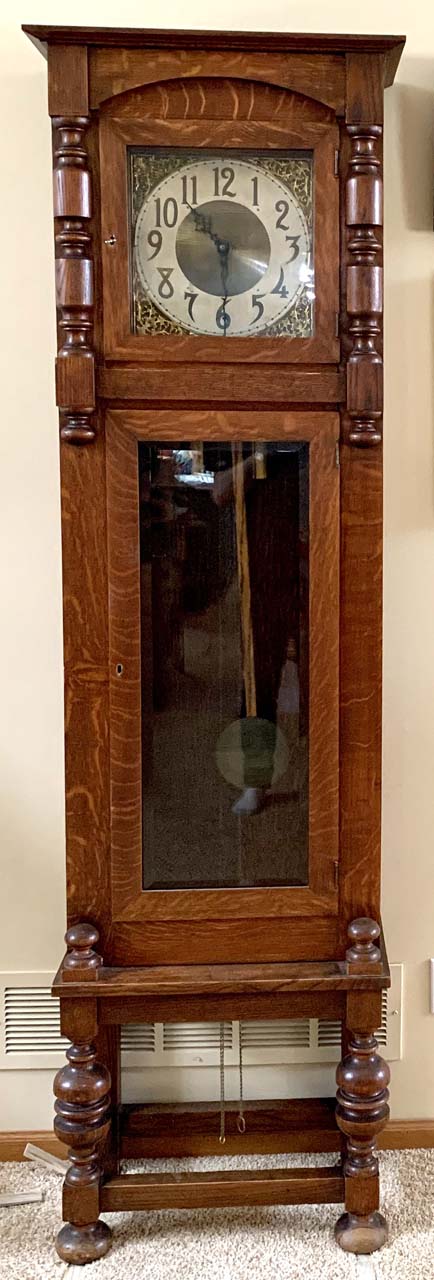
I don’t have any concrete information on the age or history of the clock, but I suspect it is a pre-war clock – somewhere in the 1920’s or 1930’s. Other than the “C” shown below, there are no marks on the movement. It is a simple two-train clock – it counts the hour and strikes once on the half hour. The clock is just short of seven feet tall. The open base makes it look a bit like the clock is standing on a chair. The lower door has beveled glass; the upper door has very old wavy glass. I presume the upper glass is original; it’s hard to say about the lower glass. I know beveled glass existed in this period, but it could have been replaced at some point.
When I first started the clock, it started right up, but the chime train wasn’t running consistently. I never assume that a clock I buy has been serviced in any recent memory, and that was definitely true in this case.
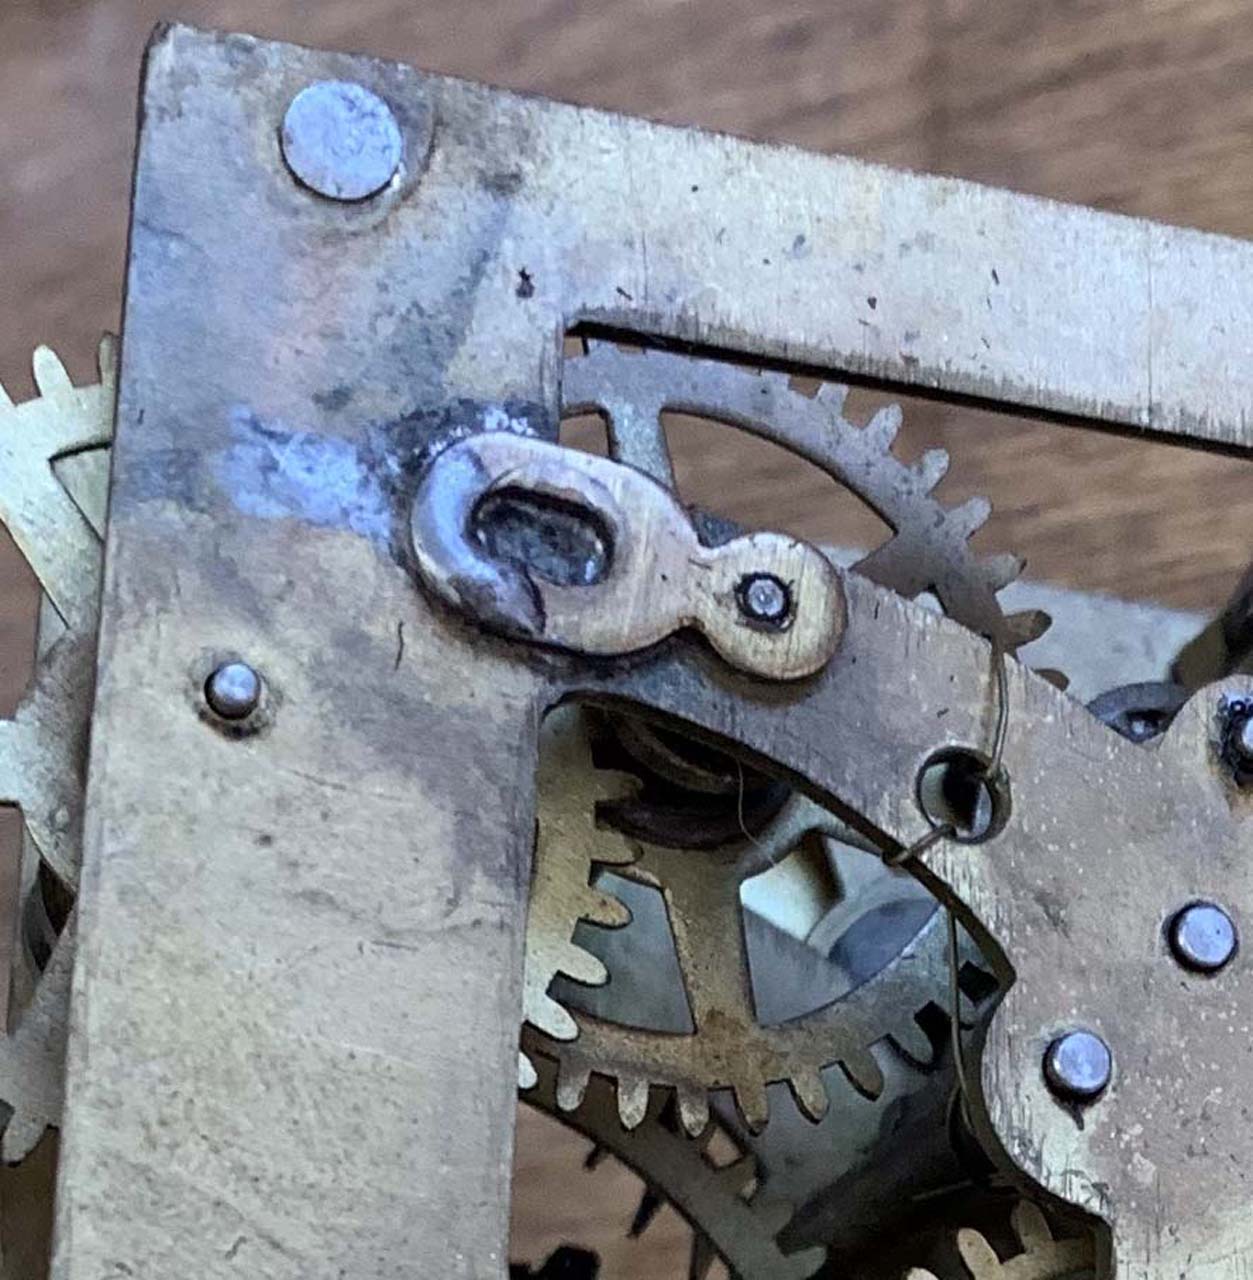
The first thing that was apparent after pulling the dial was a whole lot of dirt and a fair bit of wear in the movement.
Modern clock repair benefits greatly from a product of technical manufacturing – highly precise bushings. As clocks run, the friction of the train begins to wear on the movement. With regular service, this wear is minimal, and clocks can run for a couple centuries before the wear is significant-enough to require attention. That’s not the norm for the life most clocks live though – clocks generally are run until they stop working – the equivalent of waiting to get the oil changed in your car until the engine seizes up. How this manifests itself is enlarged holes in the movement plates. The modern solution to this problem is to ream out the enlarged hole and press in a bushing. These bushings were not available until the 1980’s or so.
Earlier repair methods consisted of either trying to close the hole by punching divots around it and smooshing the brass to shrink the hole. This works, but is ugly, and you get only one shot at this. The next time the clock needs service, there’s no more metal to move around. Bushings were sometimes made by hand – the hole was drilled out and a piece of bushing wire was pressed in and re-drilled, but this was time-consuming and error-prone.
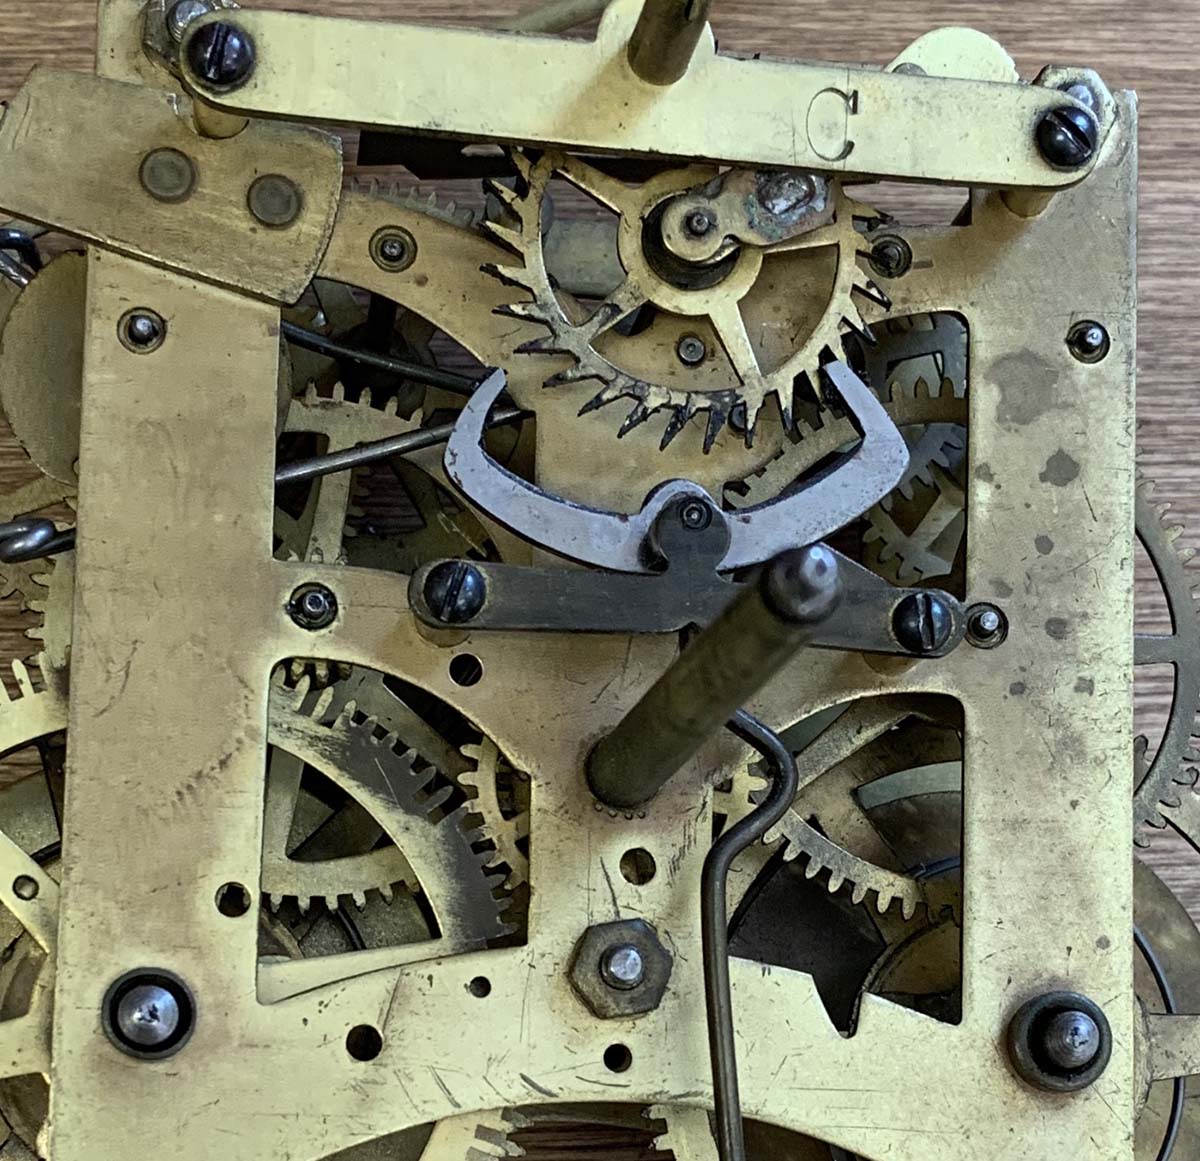
One solution to the problem that came along was a Rathbun bushing – a piece of brass with a small pivot hole and a larger hole where the repairer would drill a hole into the clock plate and put a screw through. It allowed some adjustability and didn’t require much skill to install. Unfortunately, it is a pretty cruddy repair. It’s functional as long as the pivot was long enough, but it requires drilling a hole in the movement that wasn’t there before.
This clock was the recipient of two Rathbun bushings – one on the front side of the escape wheel, and one on the strike train, shown above. Mercifully they were soldered in rather than drilled in and so could be removed without leaving a hole in the movement.
After polishing the pivots and bushing the movement plates, I reassembled the movement. The clock ran and chimed correctly, and using my timing machine, set it to 3600BPH – one tick per second, which is standard for large clocks, but it wasn’t keeping time. Making a long story short, this clock isn’t a 3600BPH clock – it’s about 3708BPH. This is a really odd thing – I don’t understand why they chose to do this – the clock is certainly big enough to accommodate a 3600BPH pendulum. 3708 is off just enough to be annoying, without any apparent benefit that I can see.
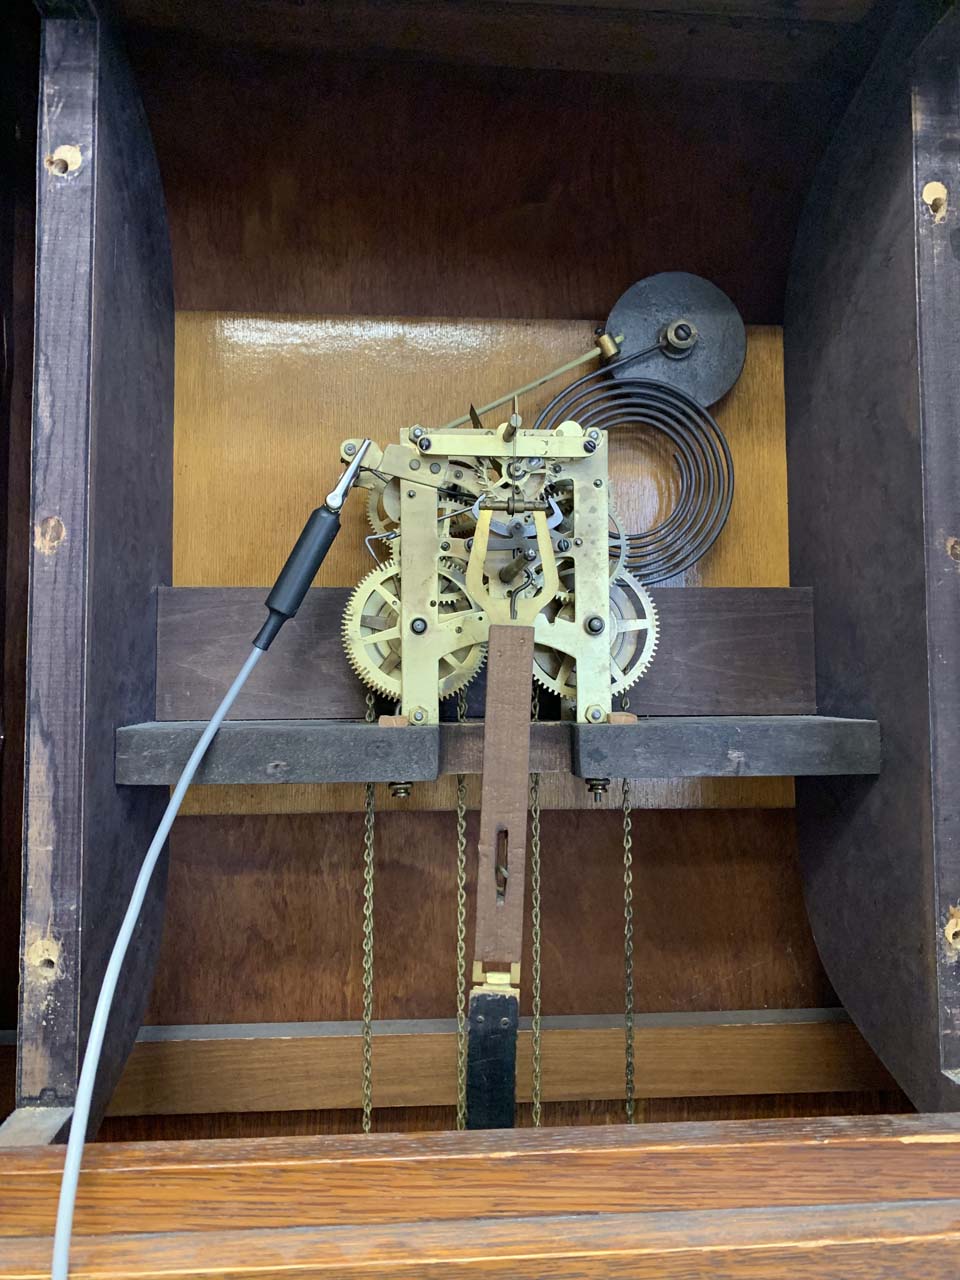
The pendulum that came with the clock didn’t match. It was the wrong color, was beat up, and was the wrong length. I decided to make a new one that better matched the clock. Pendulum rate is not linearly related to pendulum length. As pendulums get longer they slow down, but a pendulum rod that is twice as long doesn’t run twice as slow. For example, a typical pendulum with a one second tick will be about 39″ long, but a pendulum with a 2 second tick would be around 156 inches long! Because of this and the complexities of calculating how a big chunk of mass in the bob affects timekeeping, it is just easier to determine the right length experimentally.

I mimicked the original pendulum design from a piece of oak and reused the old hardware. It took a couple tries to get the length right so the clock kept time with the bob in the middle of the adjustment range, but I got it. Some stain and shellack made it a passable match to the clock case.
This was a fun project. I had a couple personal firsts – the Rathbun bushings, and the mismatched pendulum rod. I think it turned out really well. I delivered and set up the Mission Clock today for its new owner and it looks great in its new home.