I have been working on a very old clock – an English tall case clock from somewhere around 1725. This clock was last serviced about ten years ago by a respected repairer. I went through the movement doing the usual pivot polishing/bushing work. After reassembly, the strike train had a couple issues, one of which is wear on the gathering pallet.

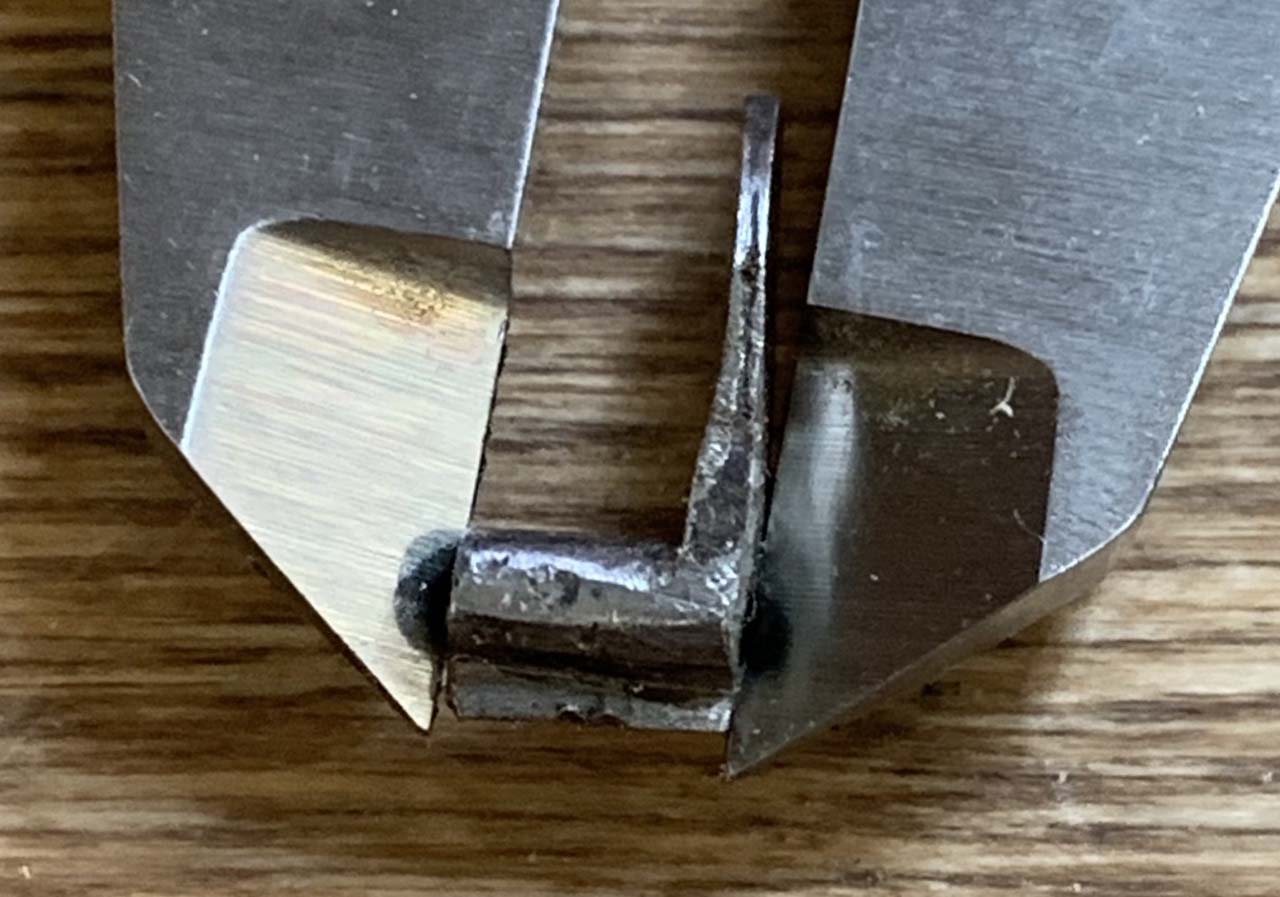
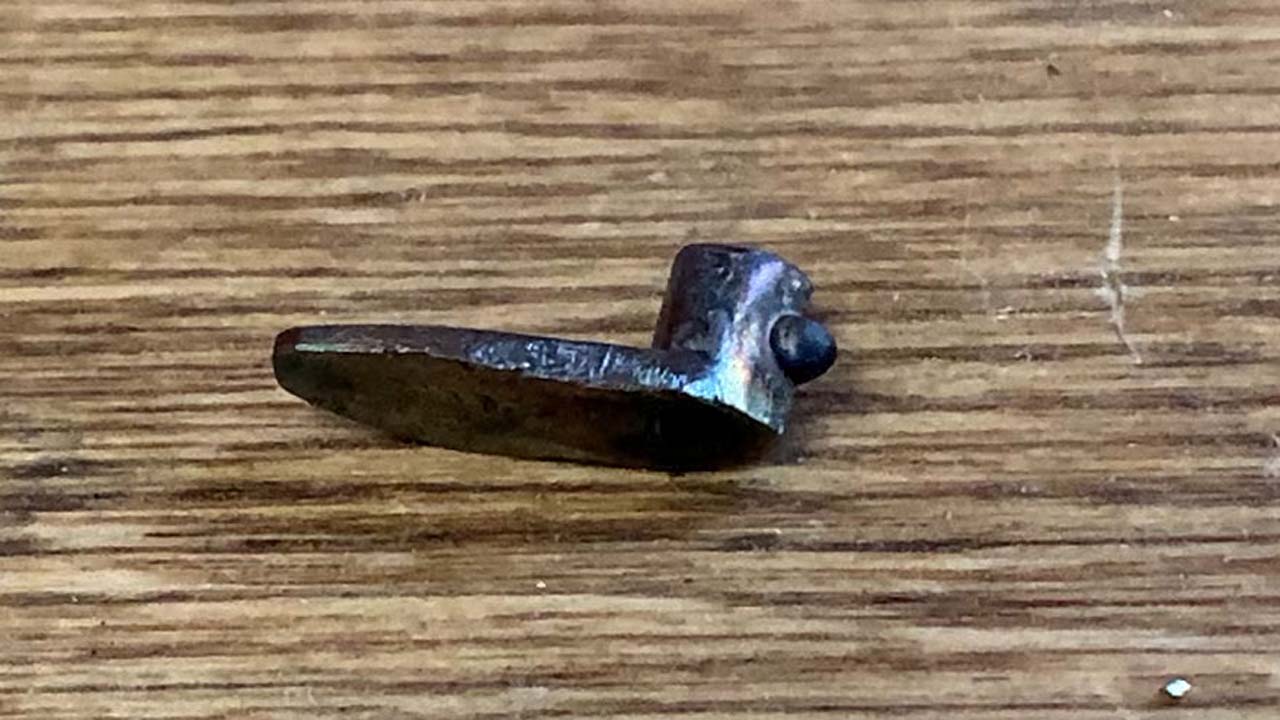
The gathering pallet is sort of like a one tooth gear that advances the strike rack so the clock stops striking after the right number of strikes. The gathering pallet has two components – the tooth that advances the rack, and the flag on the other end that contacts the stop pin to stop striking.
When the clock was made in 1725, the industrial revolution was in progress, but early on. The gears were probably machine-made, but the clock plates and other components were largely handmade, including our gathering pallet. It’s a pretty complicated part including a square hole, and a moderately tight tolerance on the other dimensions. I suspect it probably took the clock maker several hours. If I had to make one from scratch, it might take me an entire day, and that’s assuming I didn’t screw something up and had to start over. For the sake of maintaining originality and also to avoid exposing my marginal craftsmanship, I wanted to see if I could repair the wear rather than trying to replace the part.
The wear on the gathering pallet is on the tooth that advances the rack. It works marginally, but some of the time the tooth doesn’t quite engage enough with the rack to advance the rack, meaning the clock may strike too many times. The solution to this is to fill in the missing metal somehow.
There are several ways to potentially do this – silver soldering, or perhaps some kind of epoxy or modern material. The problem with these is wear resistance. Any material that could be applied cold would likely not last long rubbing on the steel rack. The best solution would be welding the part to build it up with the original material – more steel.
The challenge to welding is the microscopic size of the part. Welding melts both the original part and the filler material. The benefit of this is a welded repair is likely as strong as the original part was. The challenge is that welding – particularly on a part this small, may warp or crack the part. Thankfully, I know a great welder – my father spent his career in metal fabrication and had a few tricks up his sleeve.
There are a lot of kinds of welding. One of the most refined is TIG welding – tungsten inert gas. TIG welding uses electricity passing from a tungsten electrode to the part to create an arc, and then filler material is melted into the arc to build up the part. With care and experience, it is possible to scale TIG welding down far enough to work on parts this small. The electrical power of the welder can be adjusted to vary the amount of heat. Normally TIG welding is done at around 150 amps or more; for this job my dad used a setting of 15 amps.
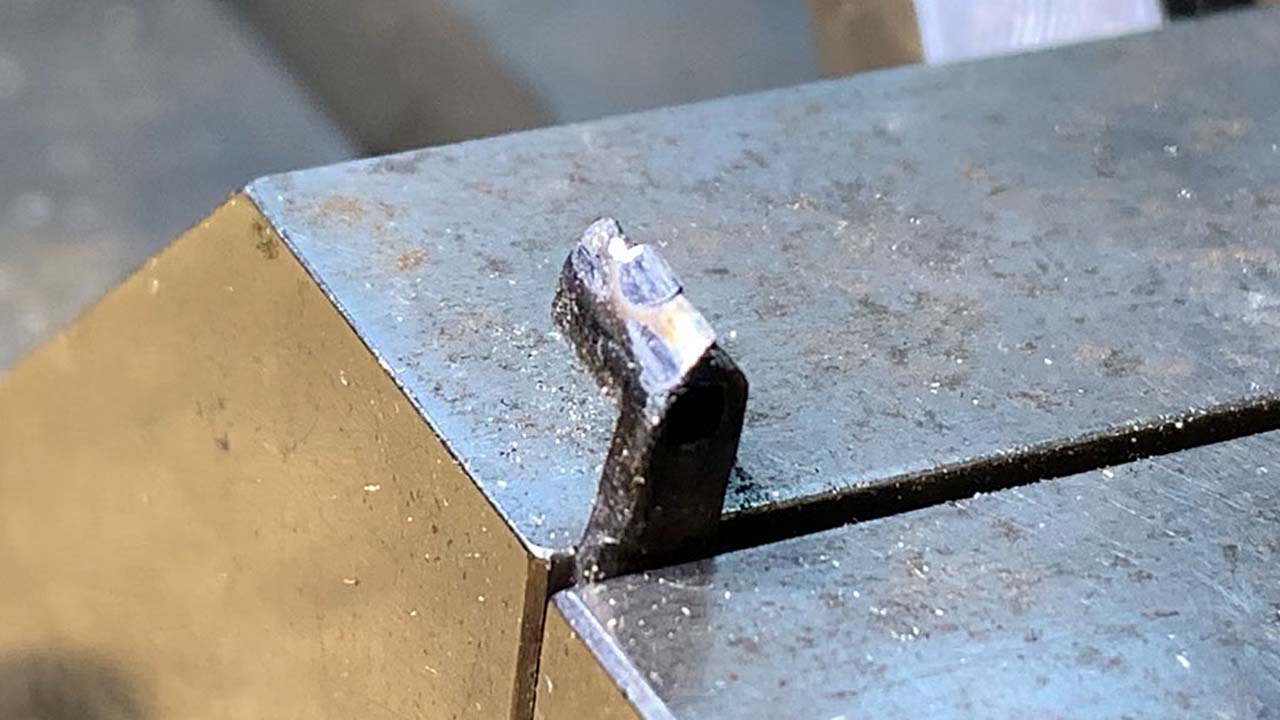
Here is the pallet after welding – a blob of steel has filled in the missing metal.
Grinding the weld back to the right form required some care. I carefully used a belt sander to remove most of the extra material, then I moved to a very fine file to match the original profile. I left a little extra material to compensate for any wear on the rack.
After a bit of polish to remove the discoloration from welding it went on the clock and is working great. Thanks to my dad for a great job that should last another couple centuries.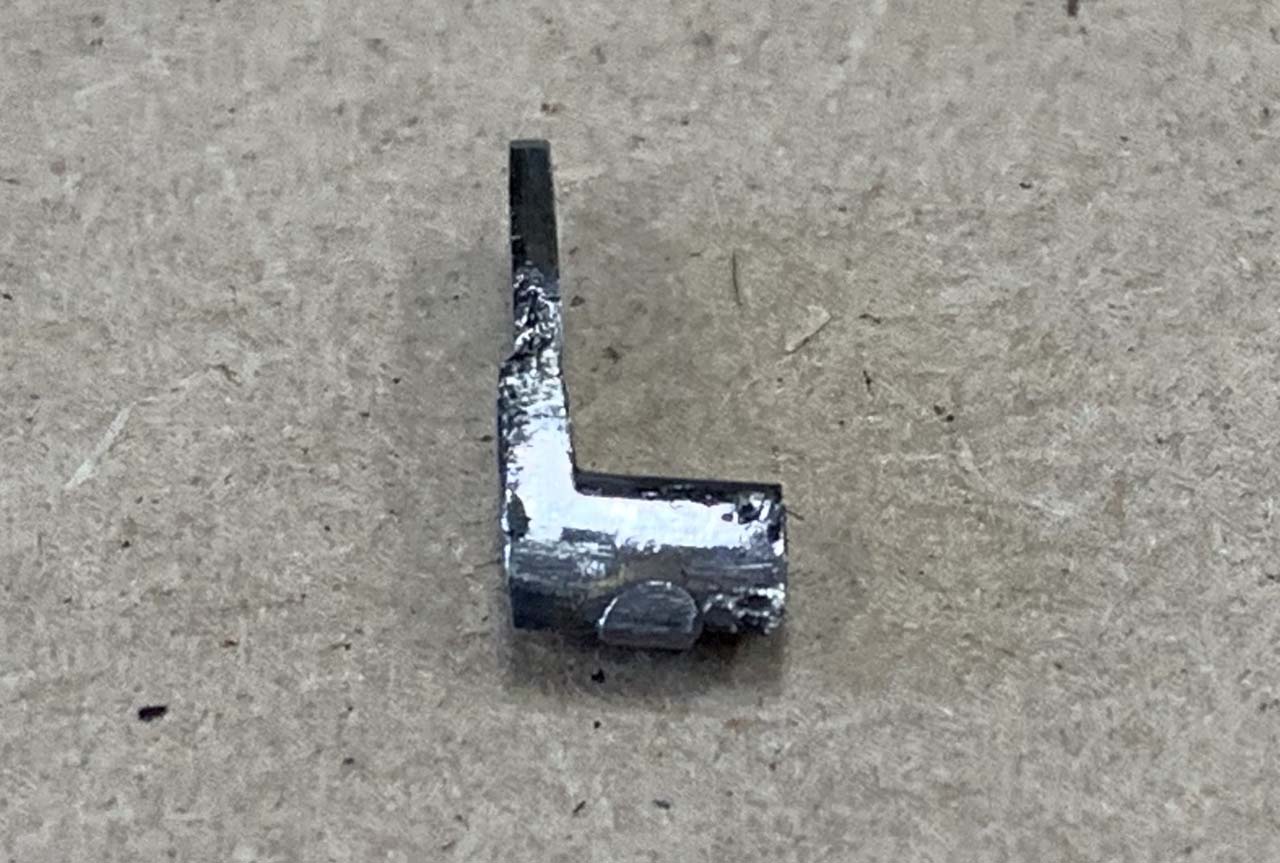
Here is the new pallet in action.